Cable Design Tool Tutorial

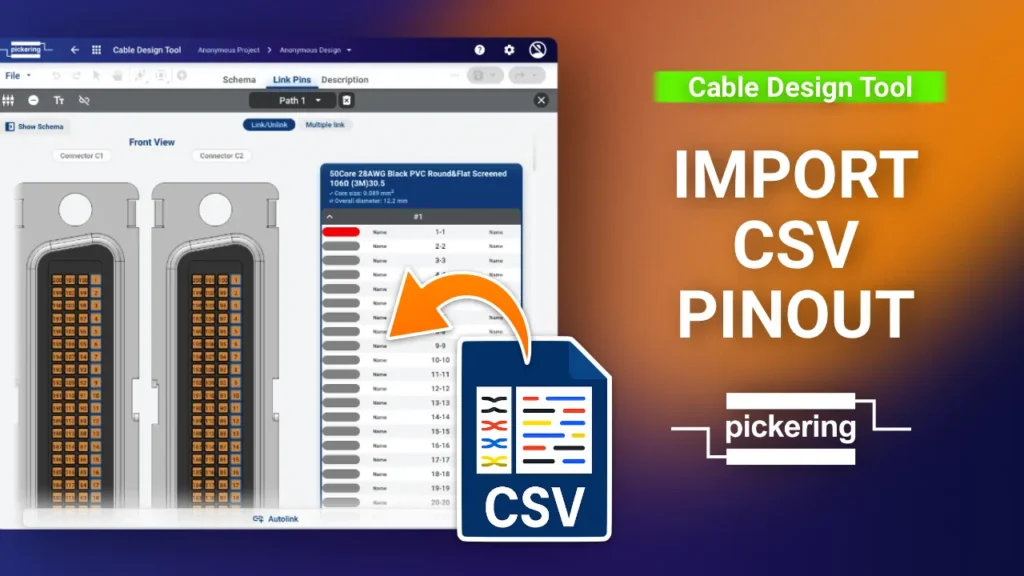
The Cable Design Tool lets you import a complete pinout from a CSV file instead of linking every pin by hand. For cable assemblies with a large number of conductors, this is the faster and safer route: you build the pinout in a spreadsheet and bring it in all at once. This guide covers the full workflow, from exporting a template CSV to importing pinouts for twisted pair cables.

Step 1

Make sure the basics are in place

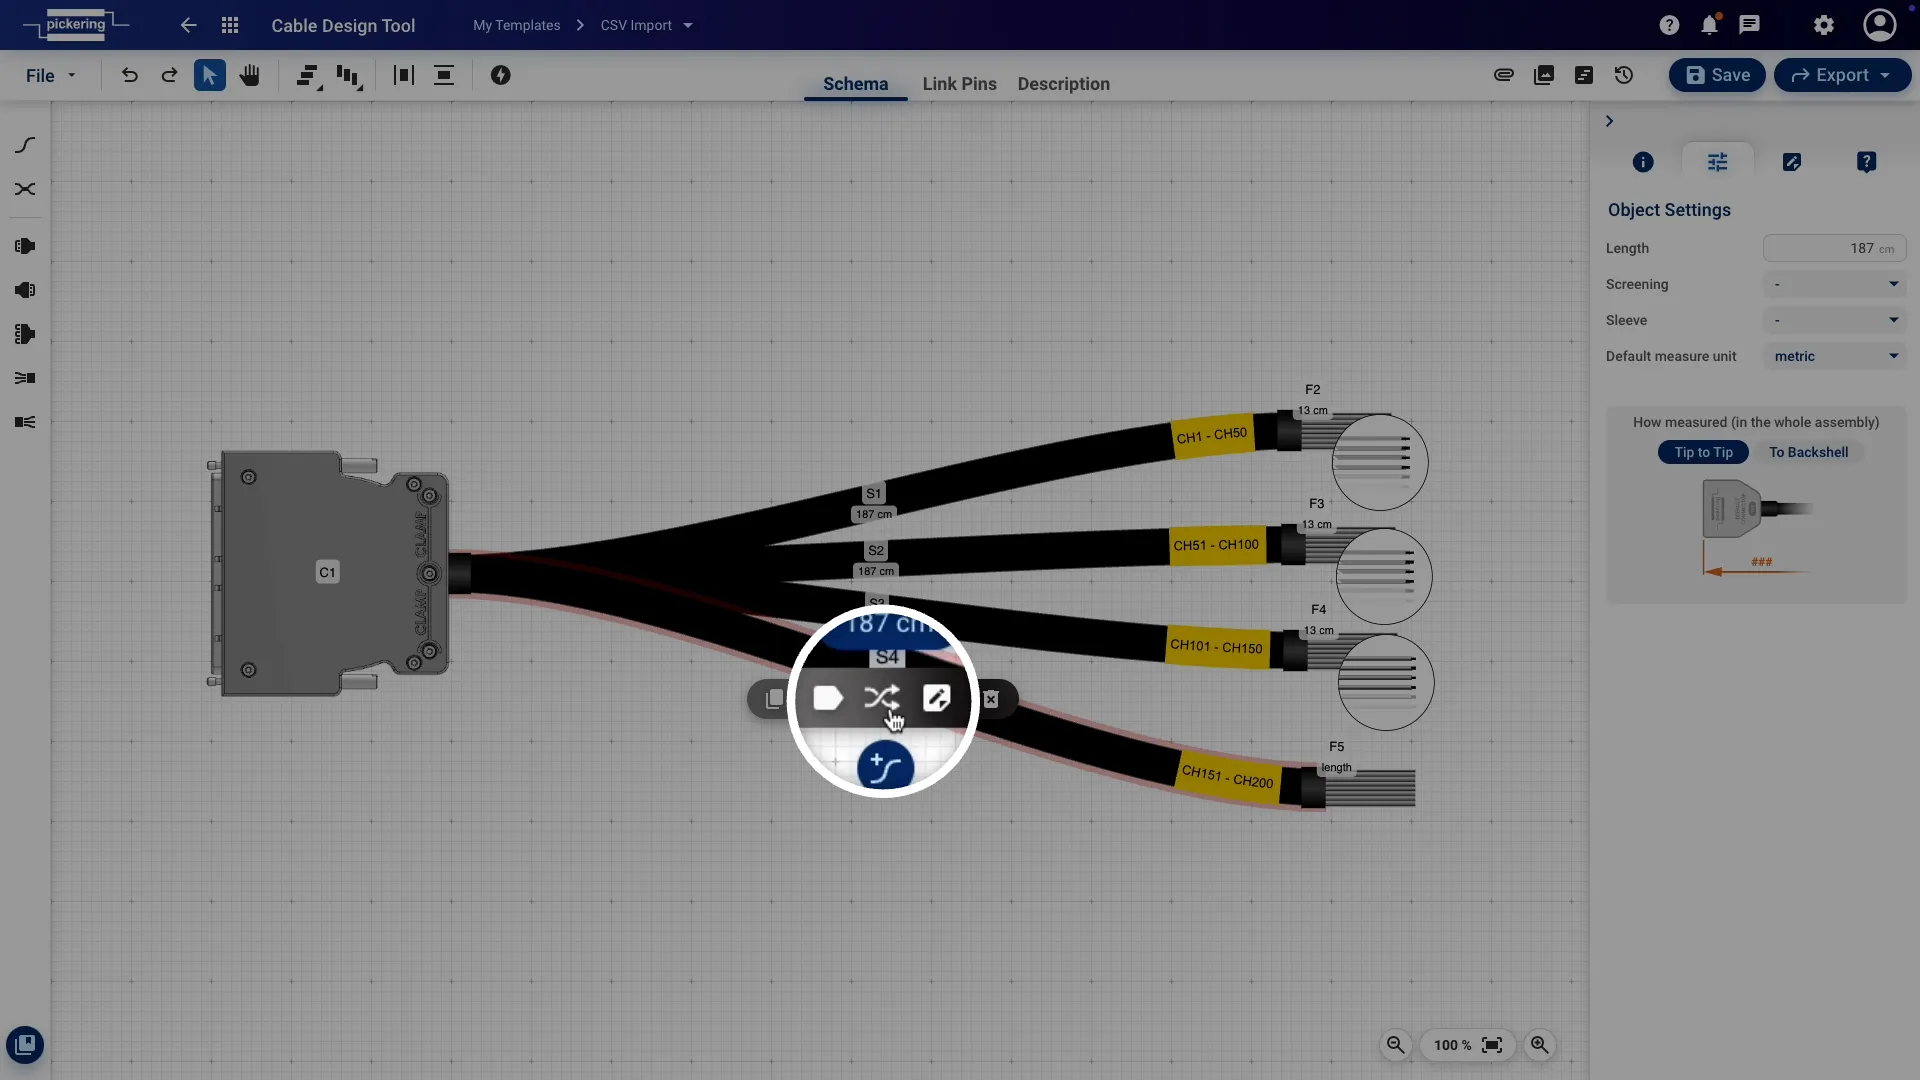
Before using the CSV import, you’ll need the cable assembly foundations in place: selected connectors, the right wires, and a linked path. Then open the pinout view: select the path you want to work on and click the Link Pins icon.

Step 2

Link a few pins manually and export a template CSV

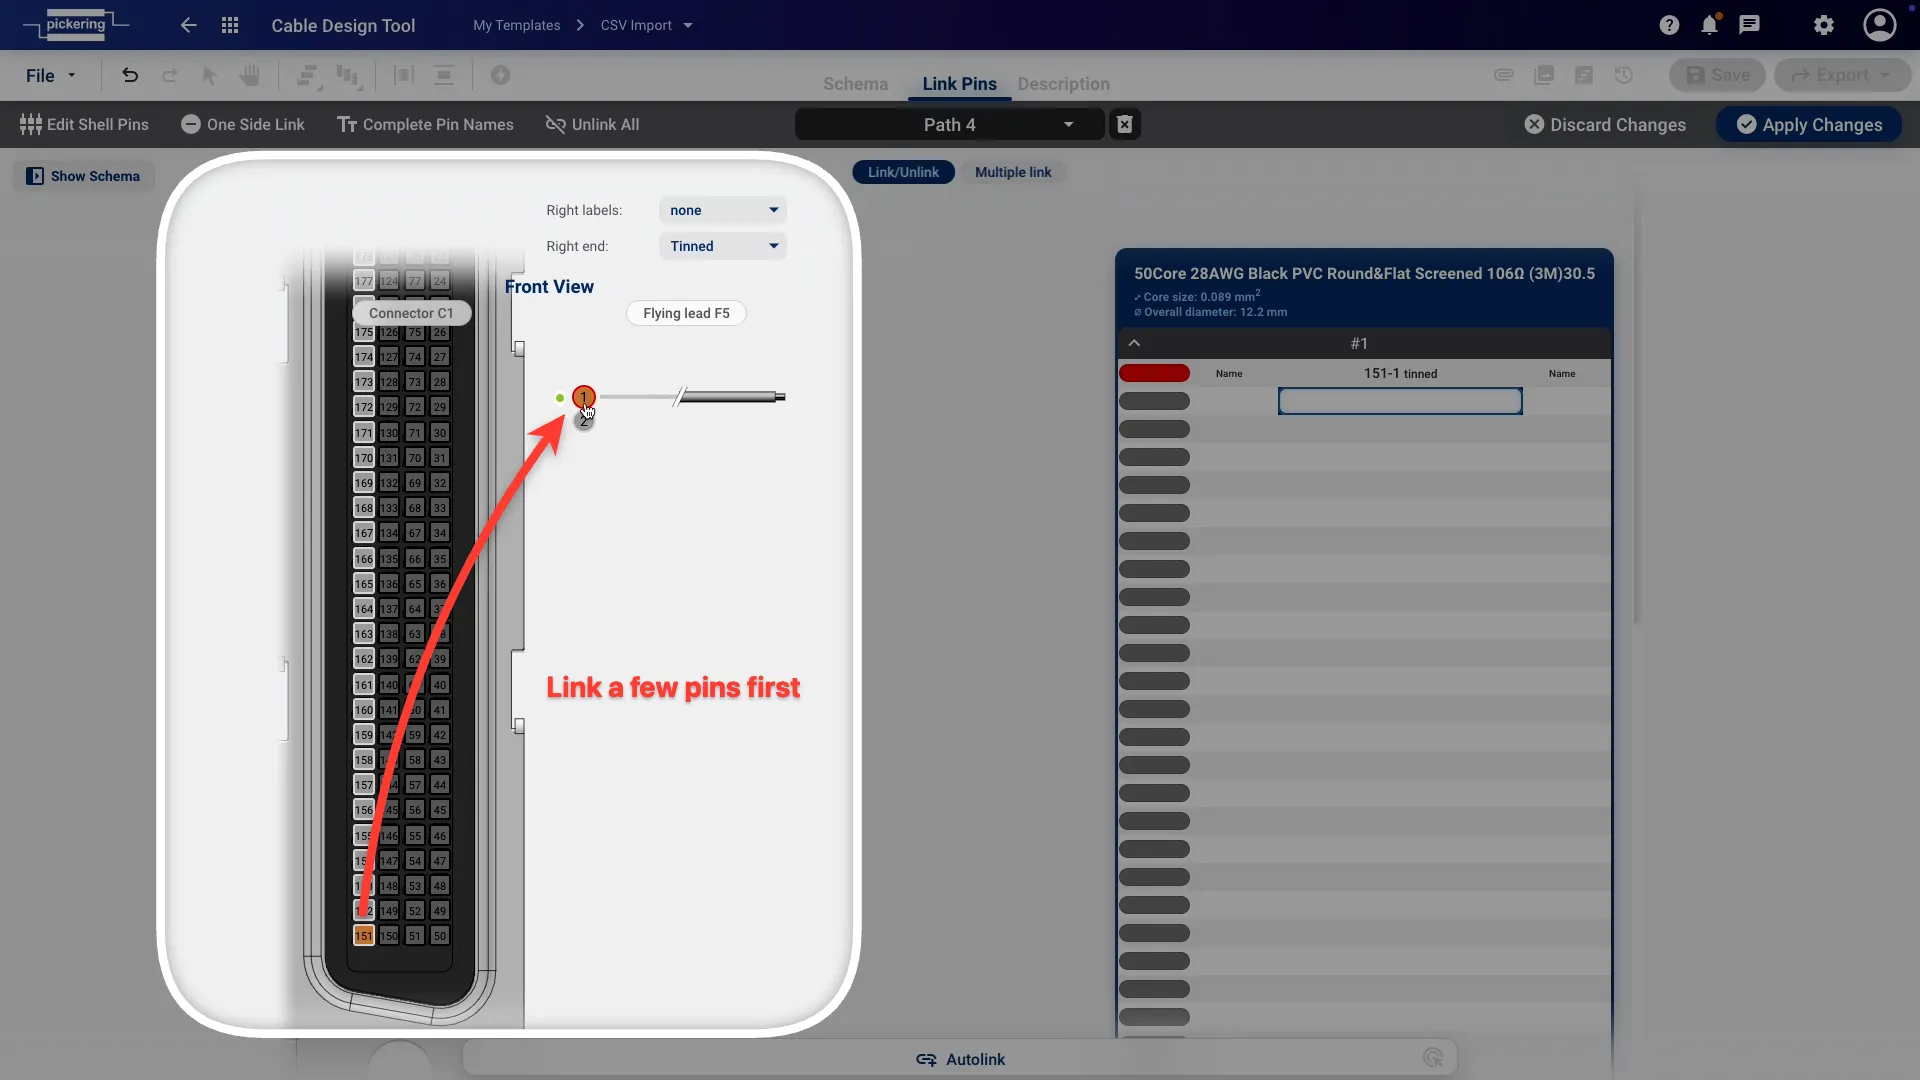
Once you’re in the pinout view, link one or a few pins manually first. This lets you export a correctly formatted CSV file that you can edit externally and import back in.

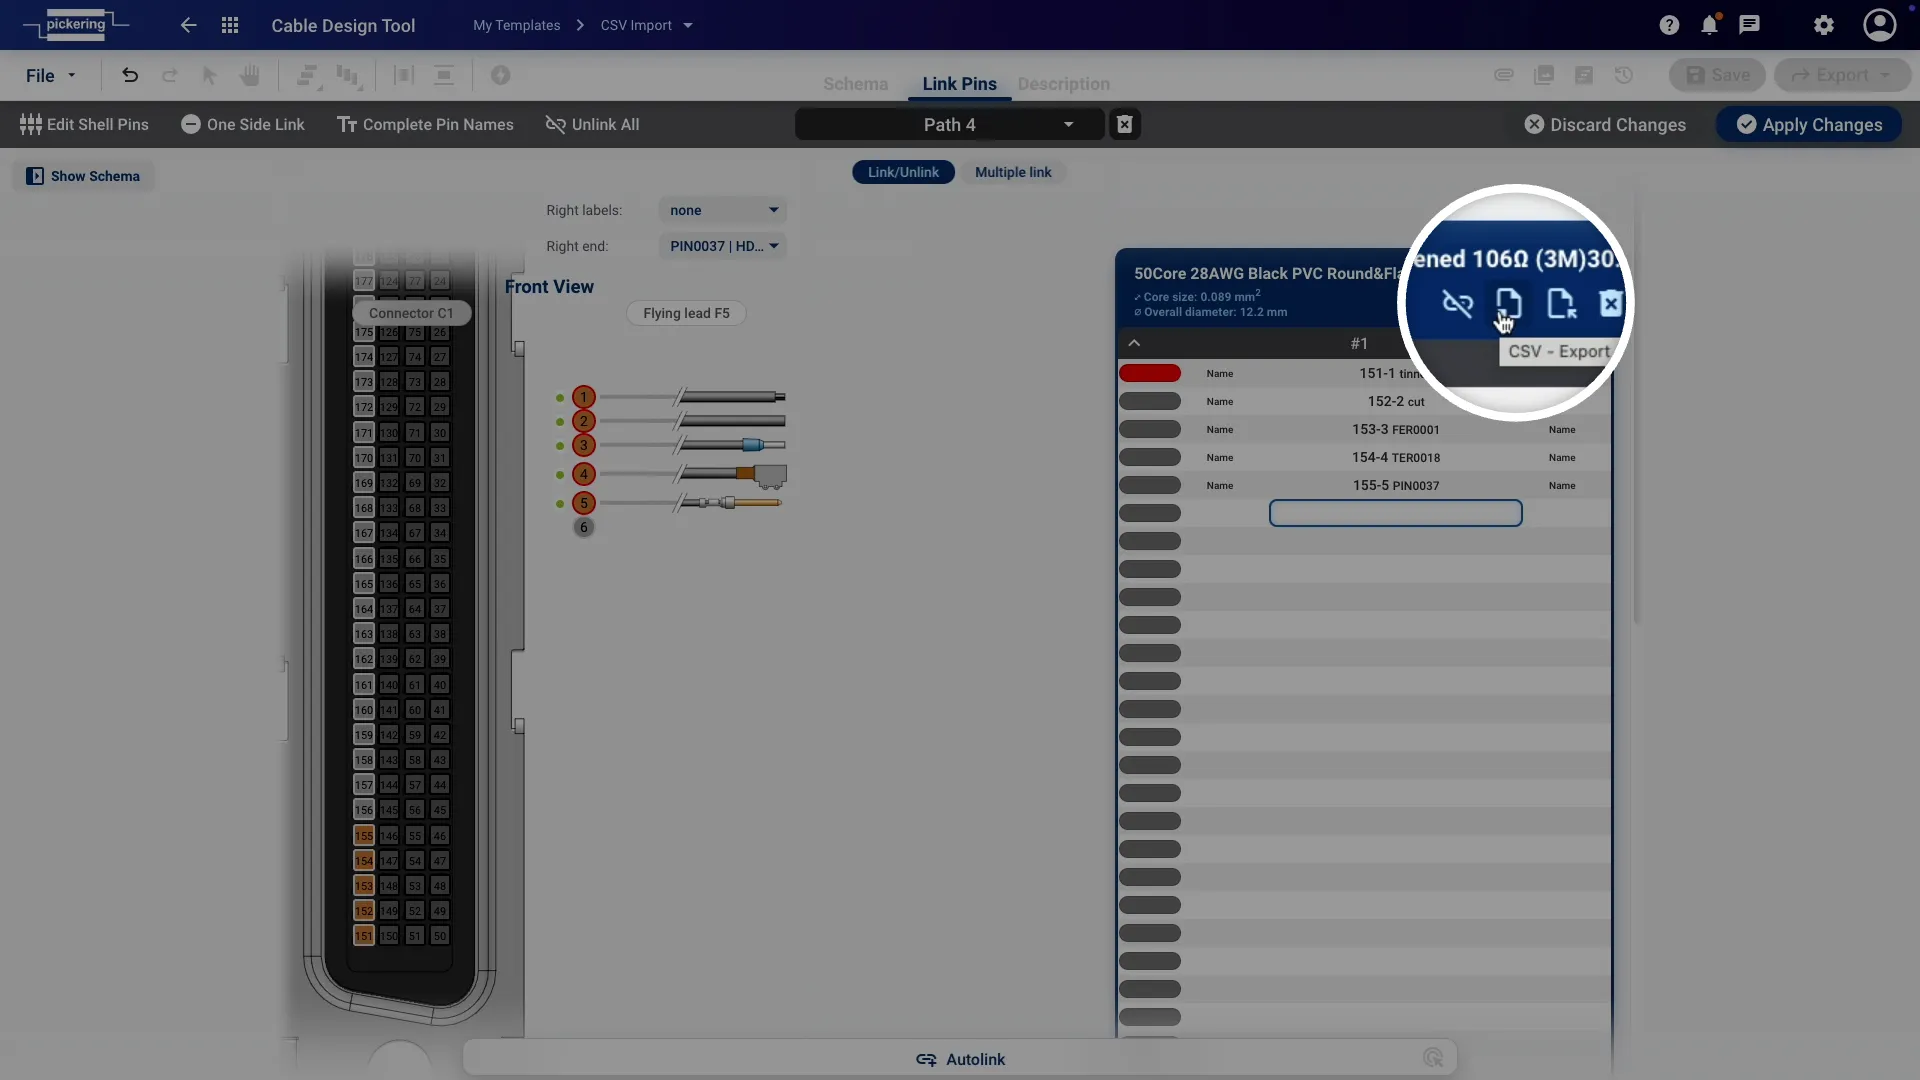
To export, click the Export CSV button at the top of the pinout table.

Step 3

Edit the CSV file

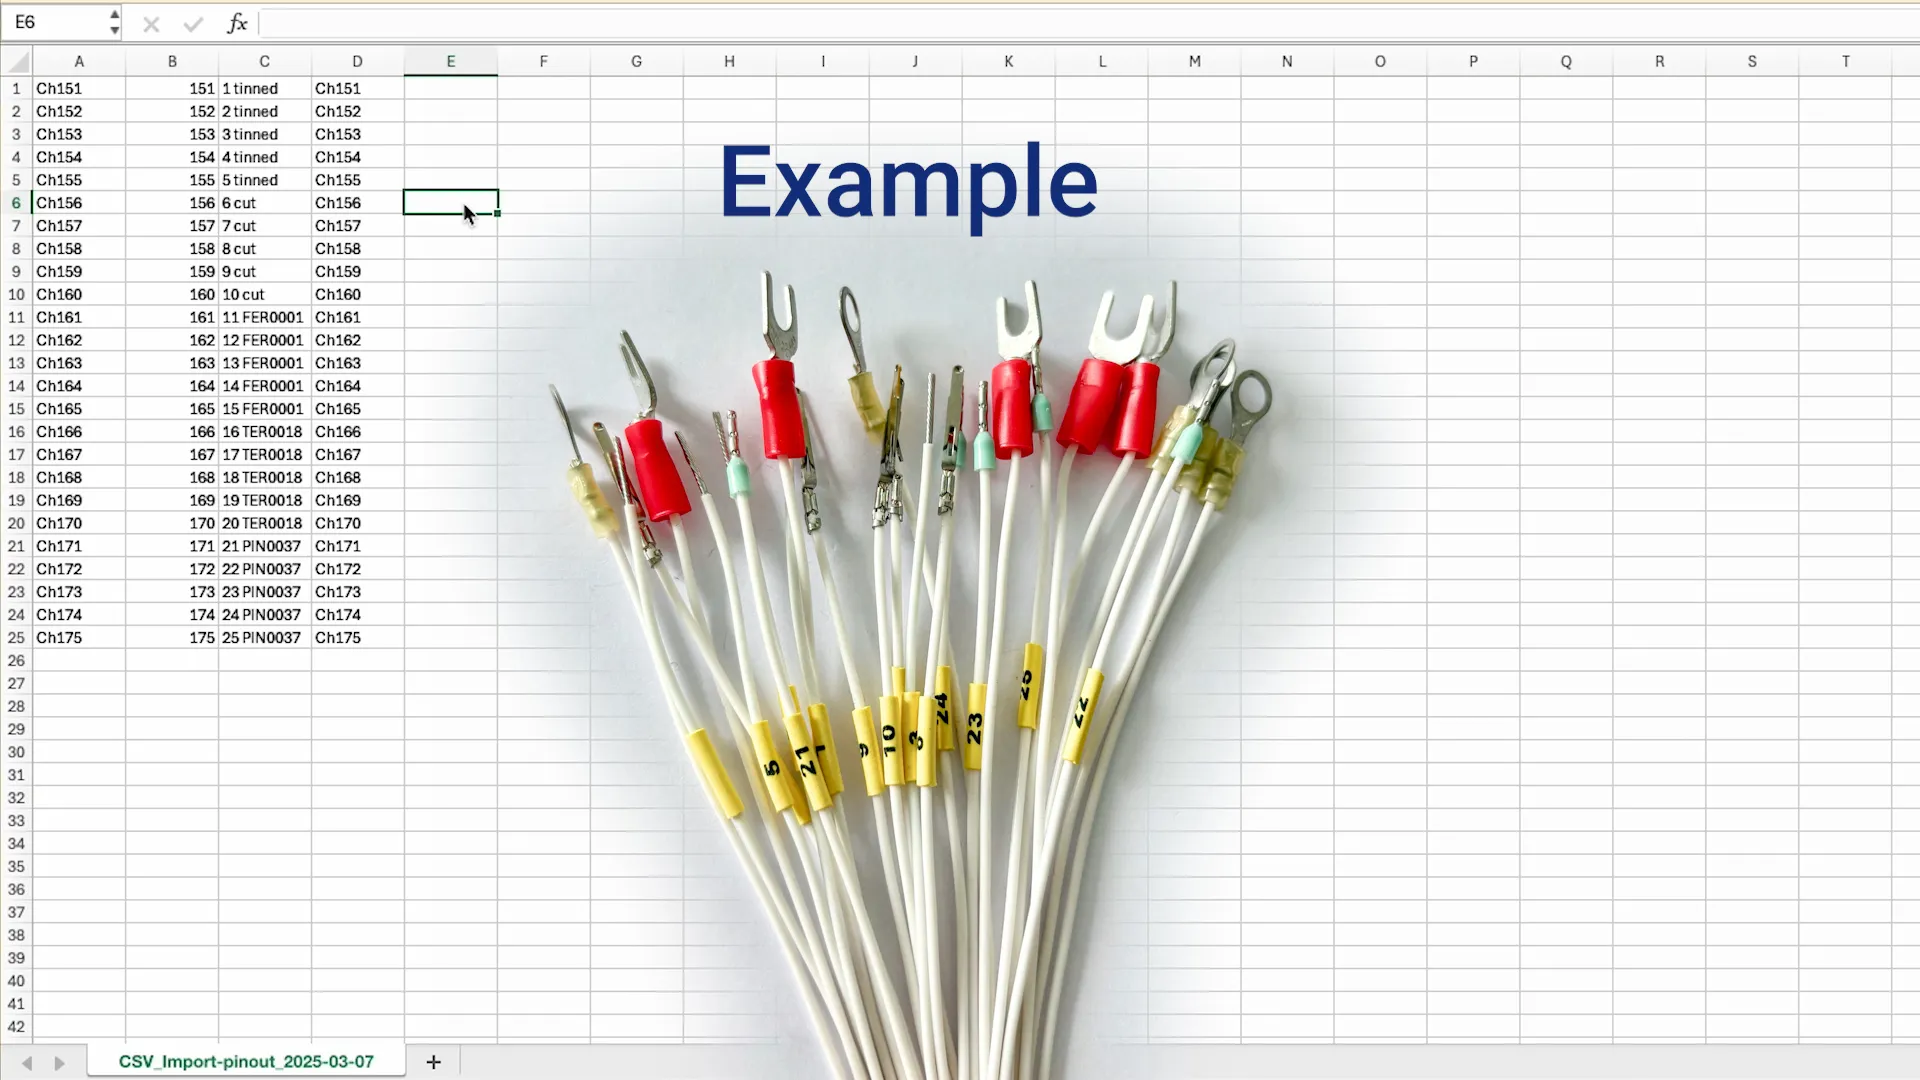
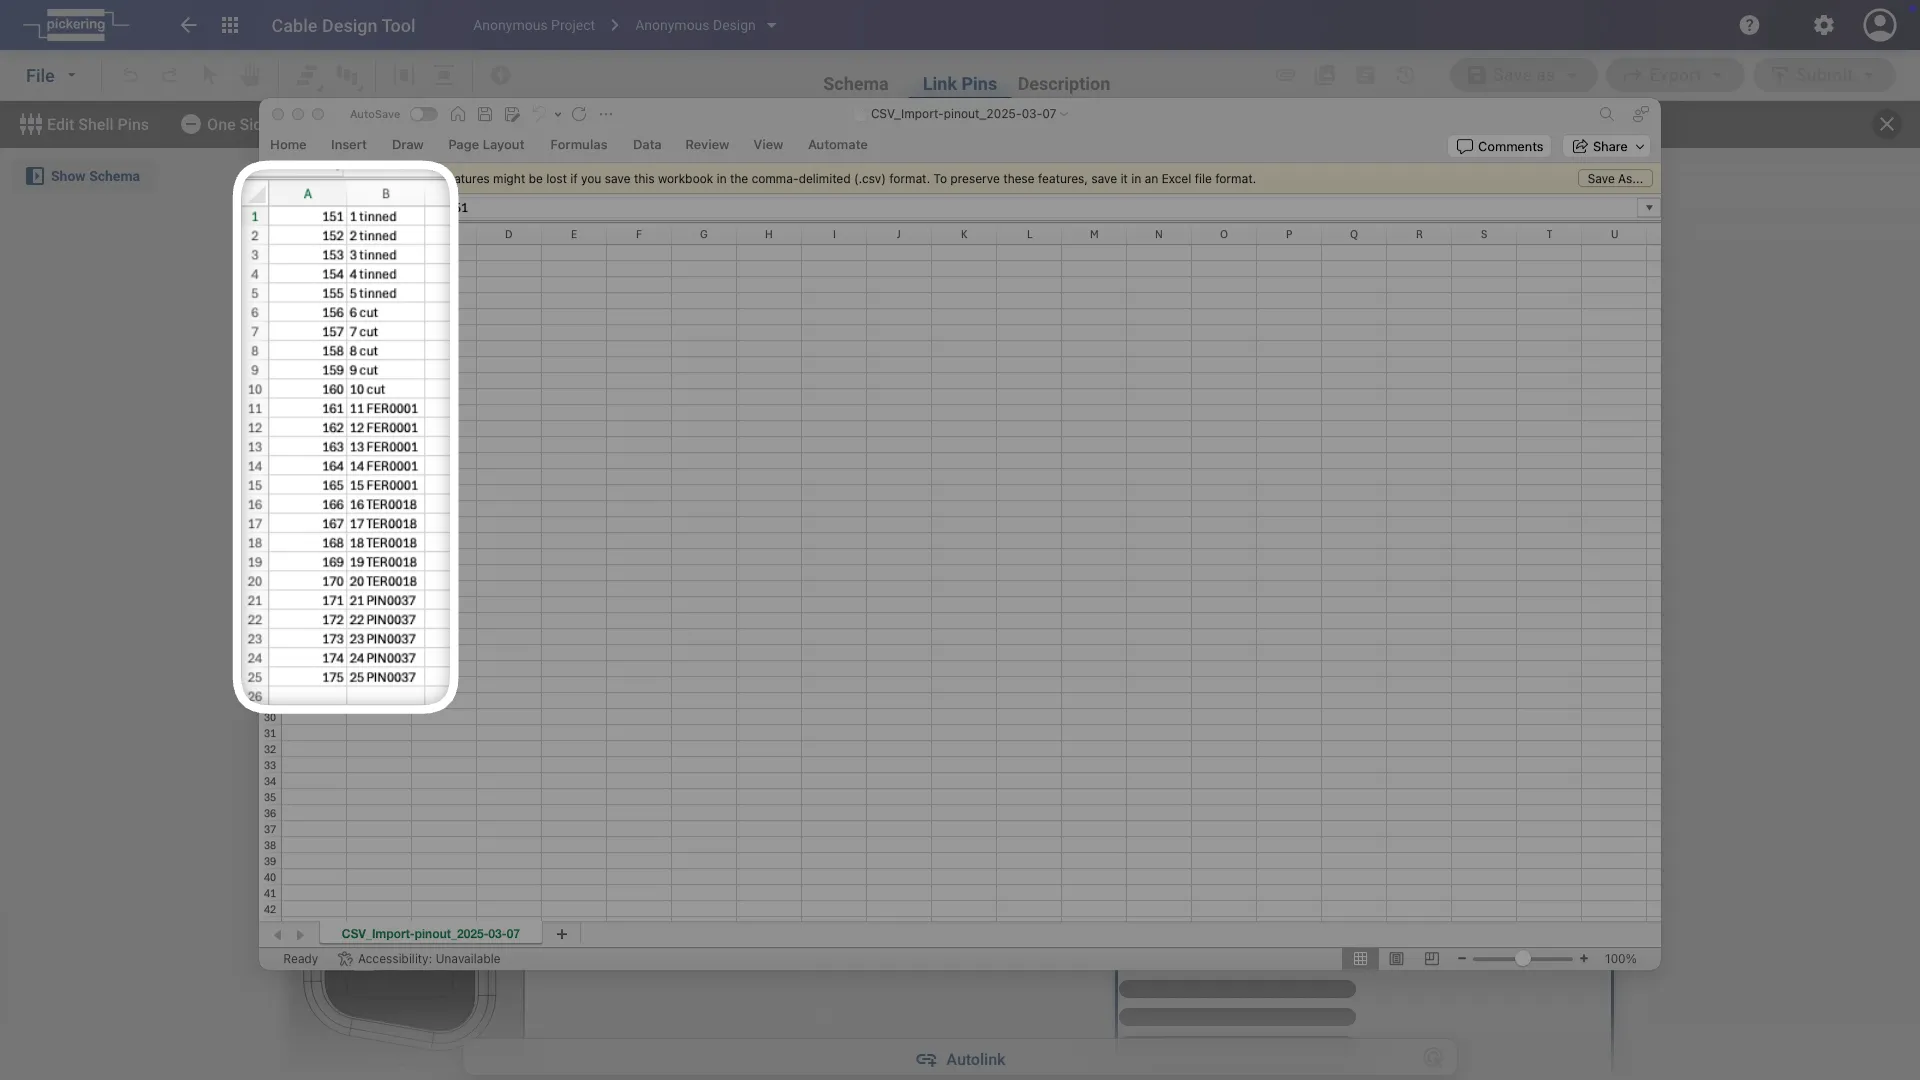
Open the exported CSV file. The structure mirrors the pinout view directly:

  • Column A: pin names for the left-side connector
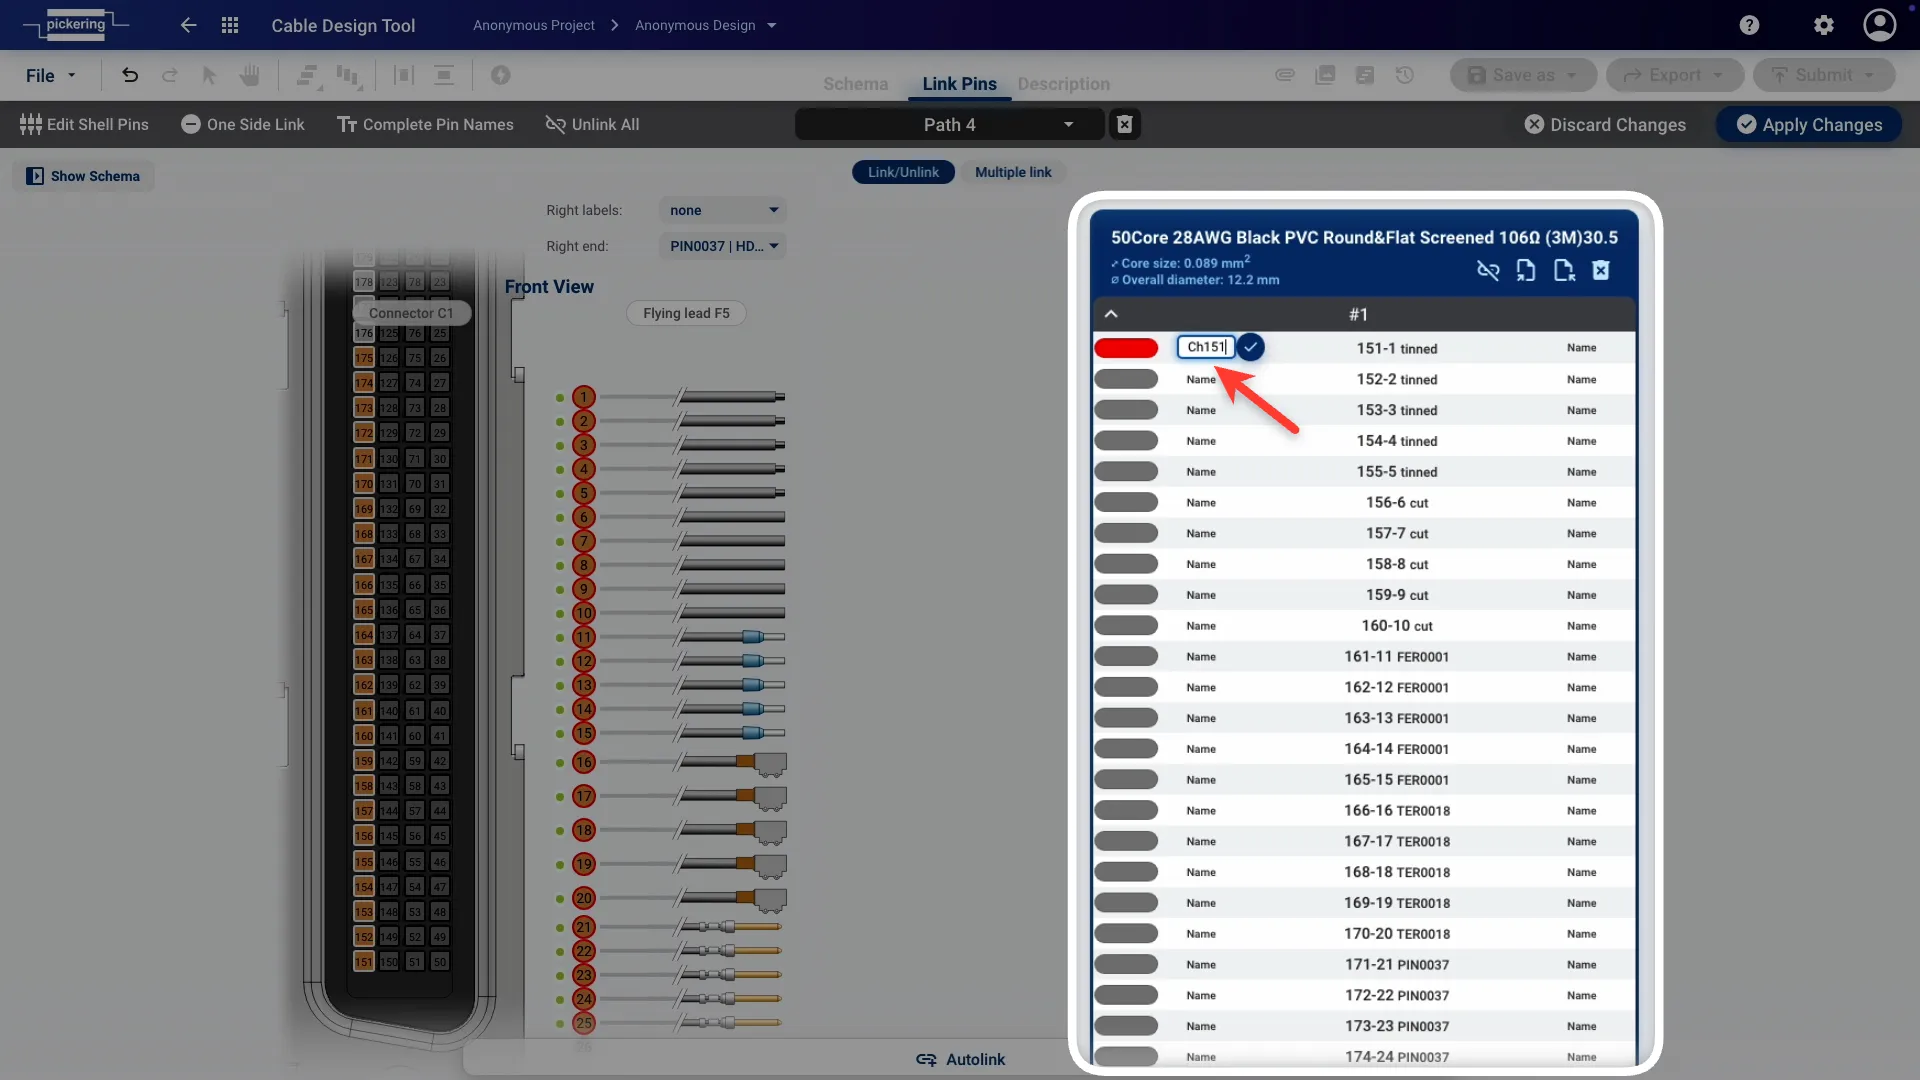
  • Column B: pin numbers for the left-side connector (e.g. starting at 151 for the fourth path of a 200-pin connector)
  • Column C: pin numbers for the right-side connector (for flying leads, always starting from 1 regardless of how many paths the cable has)
  • Column D: names for the flying leads on the right side. Useful if you want them printed on heat shrink at the wire ends during manufacturing (see example).

Columns B and C are the critical ones: they define exactly which pins on the left side connect to which flying leads on the right.

Step 4

Import the CSV and save

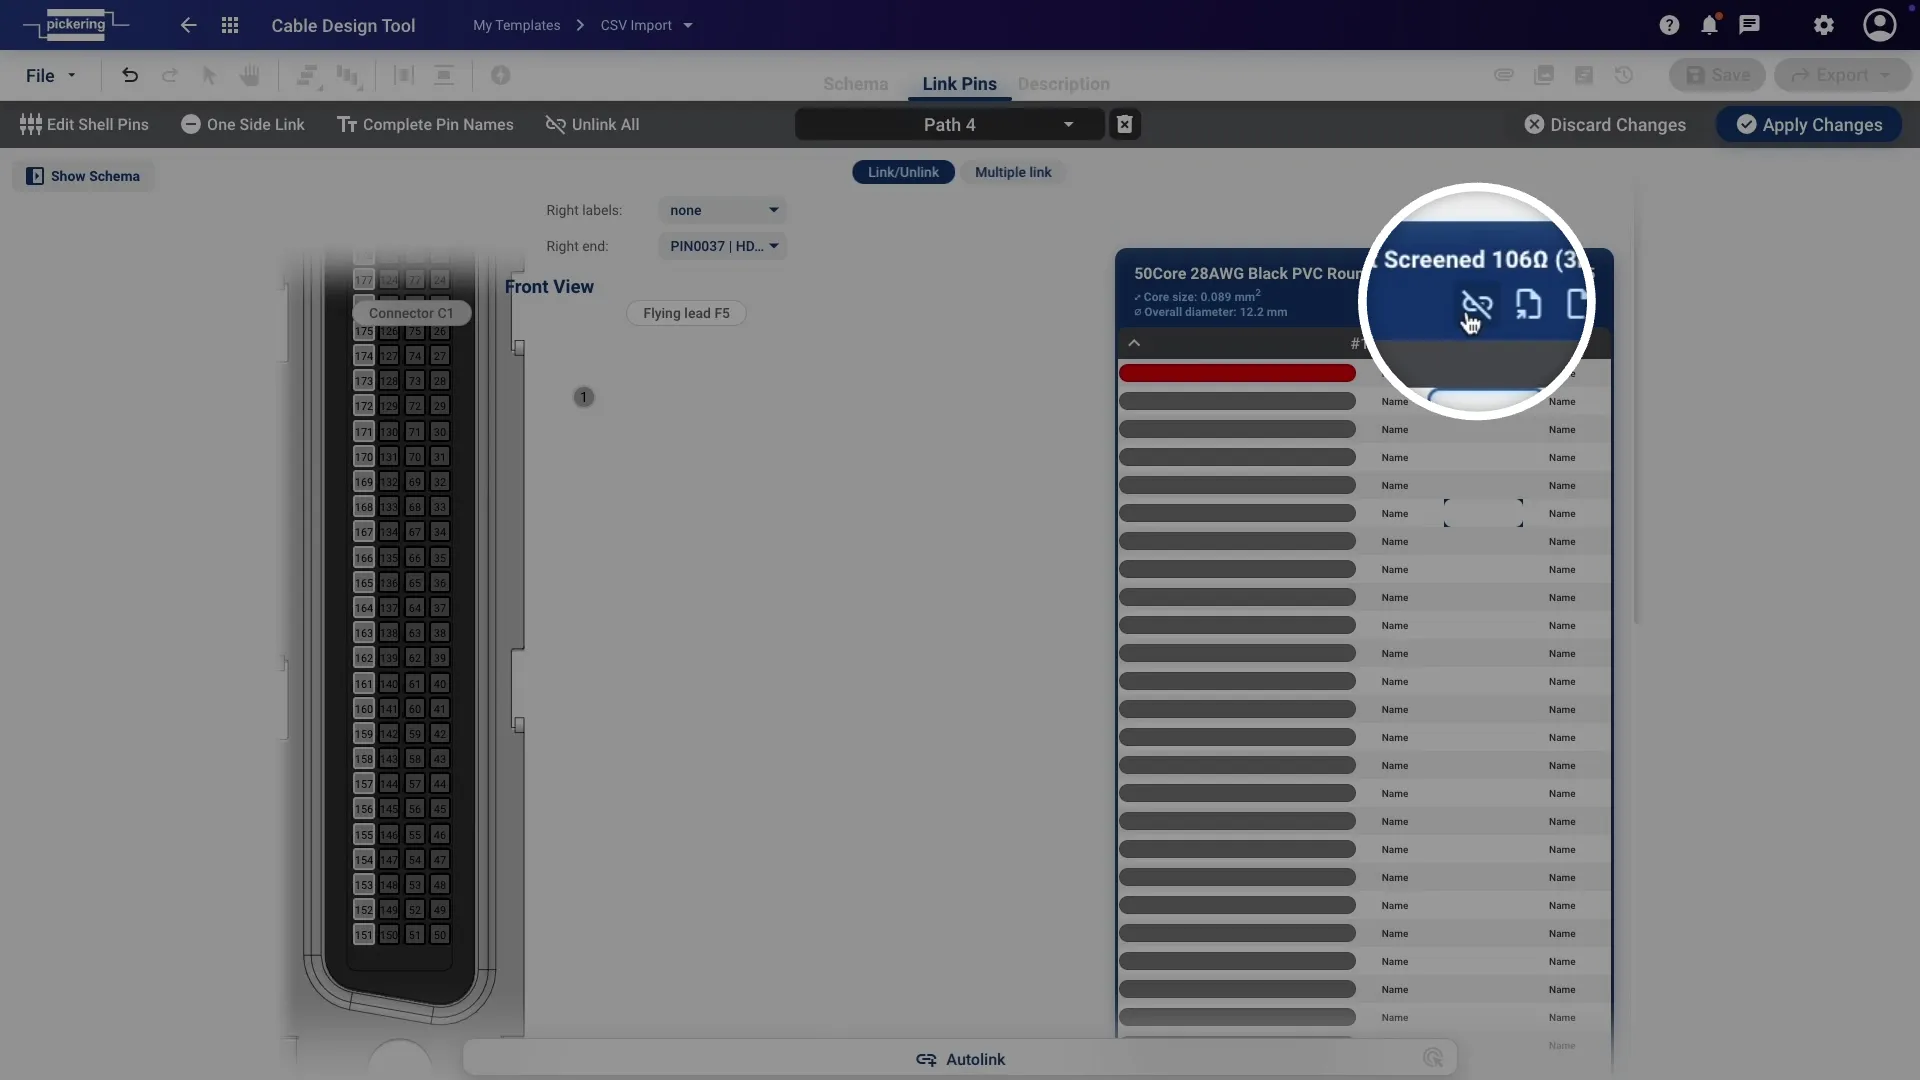
Once your CSV is edited and saved, you’re ready to import. Before you do, unlink all wires in the pinout view first.

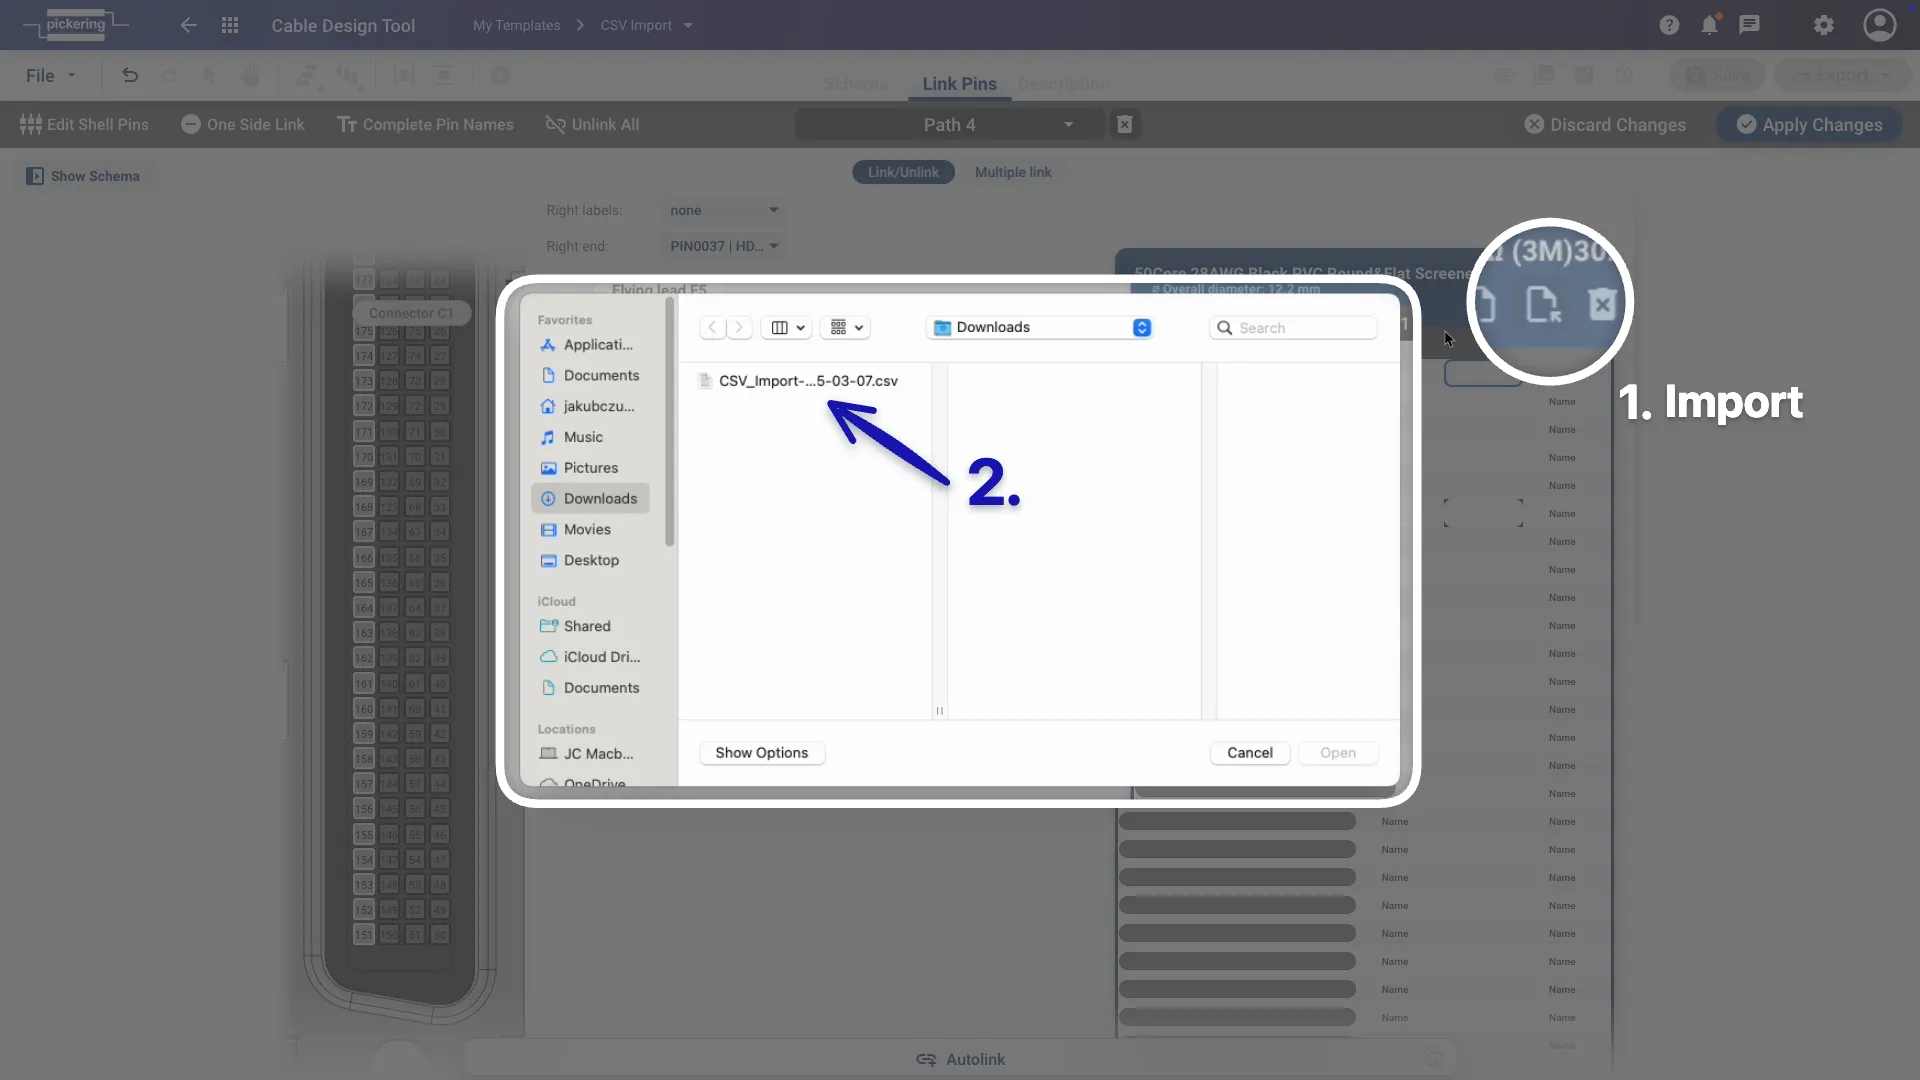
Then click the CSV Import button and select your file.

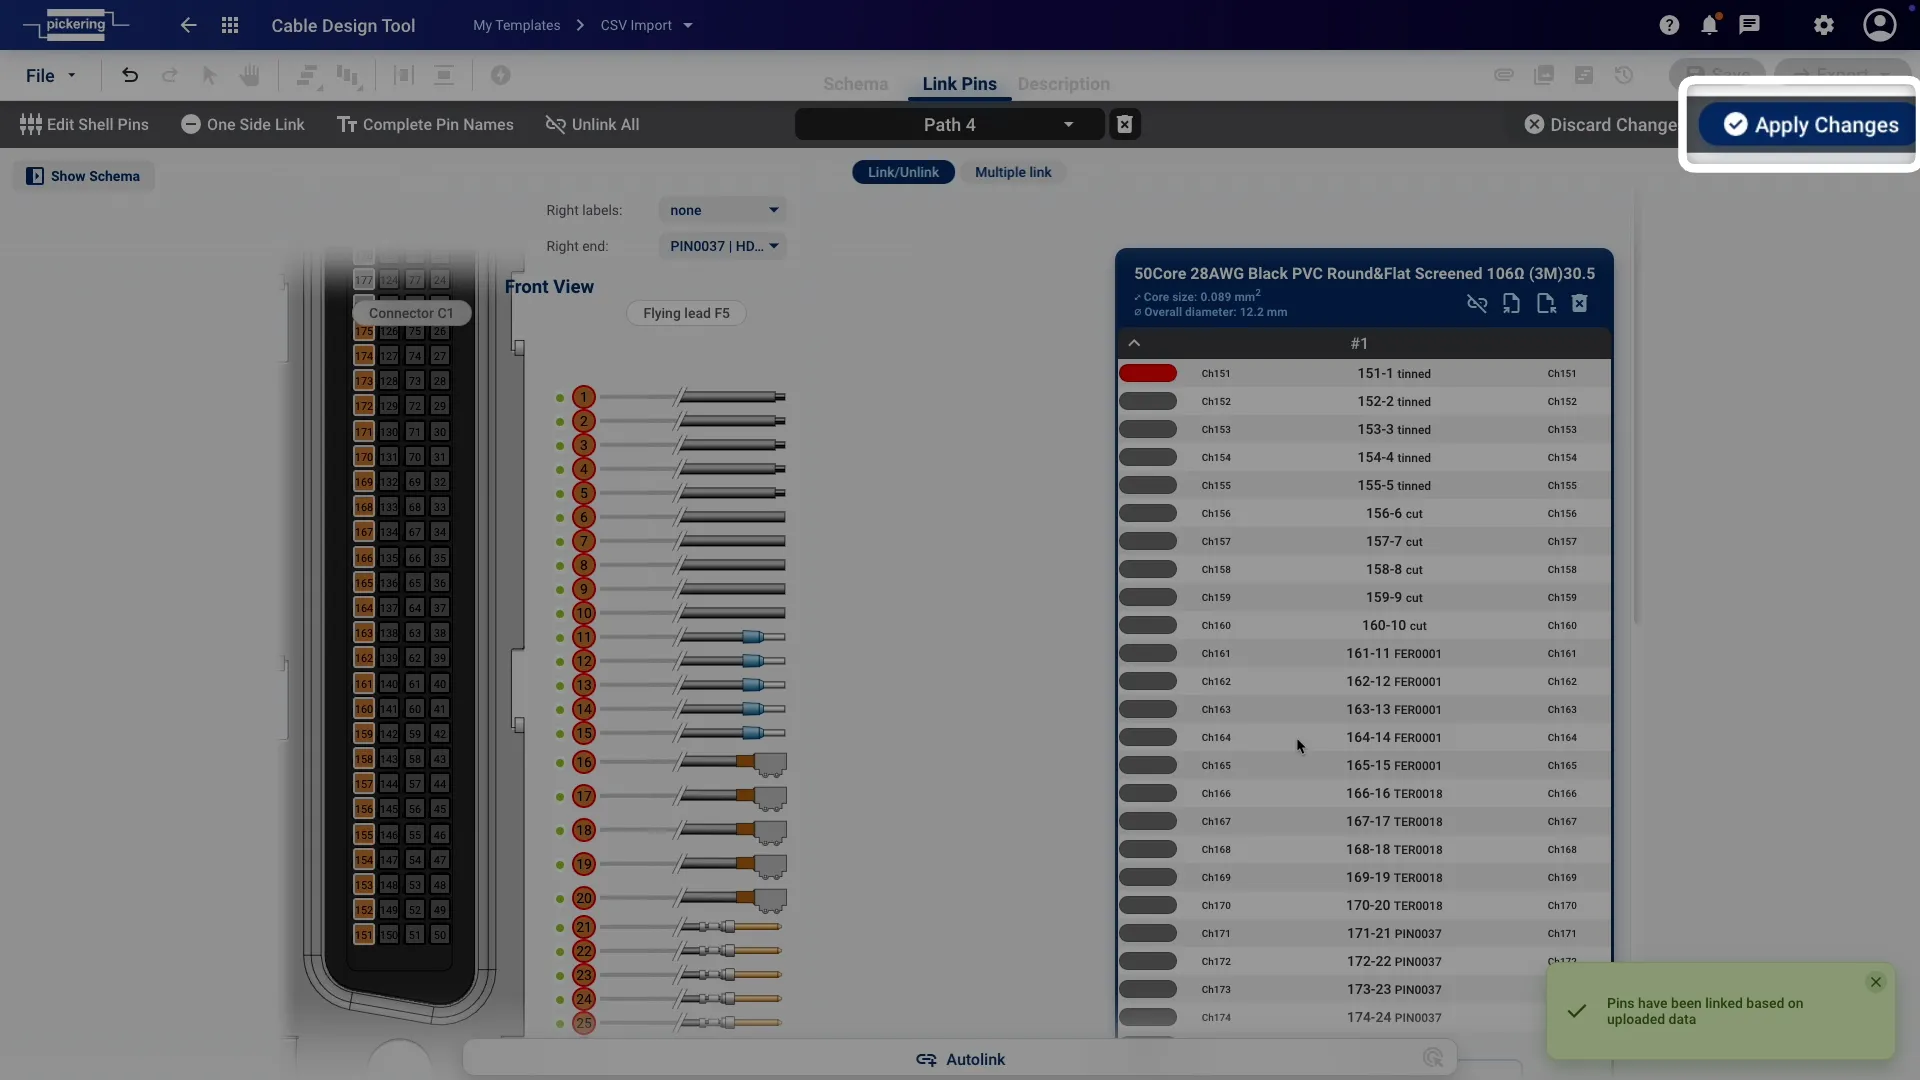
The pinout imports immediately. To save the changes, click Apply Changes in the top right corner.

Step 5

CSV variation, pins without names

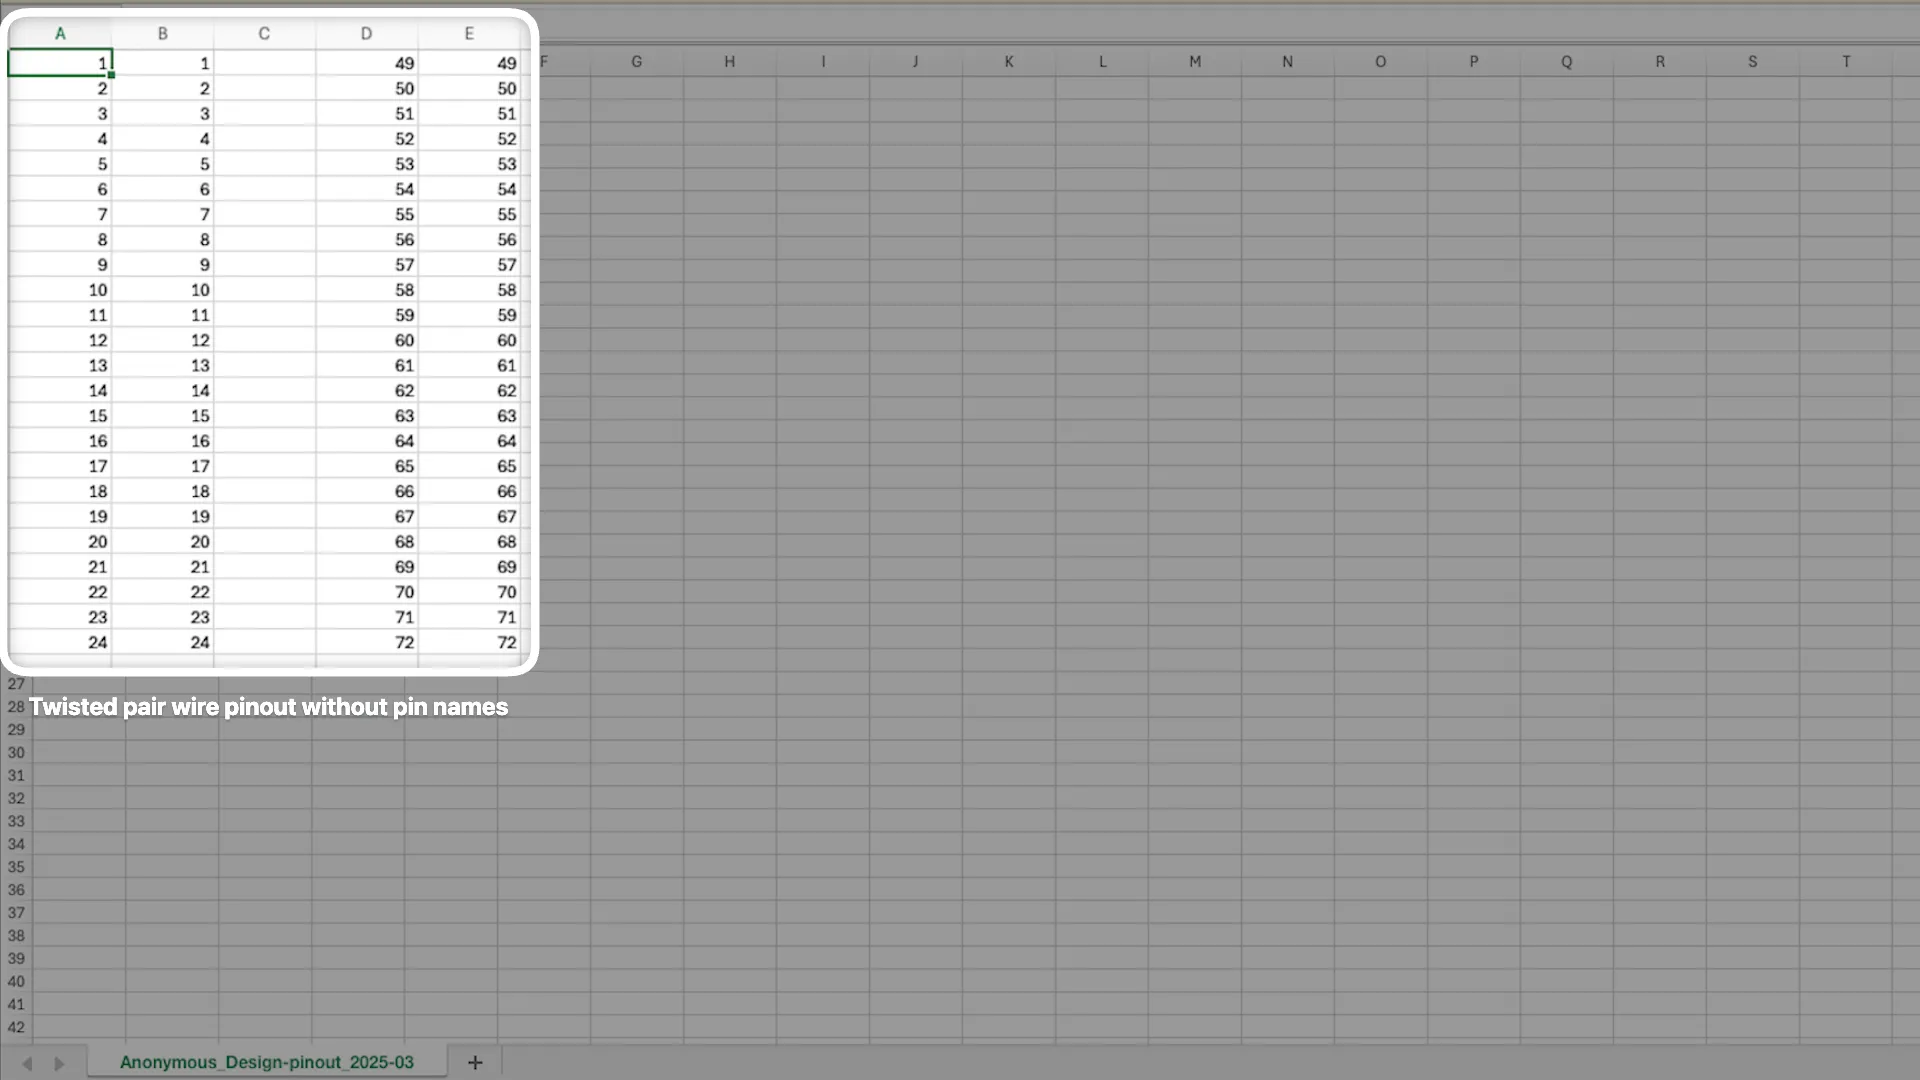
If you don’t need to assign names to the flying leads, you can simplify the CSV: define which pin on the left (Column A) connects to which flying lead on the right (Column B). Without the name columns, the pin numbers shift left into Columns A and B.

After the import, the pins are linked without names. If you want to add pin names or make further changes, you can edit the pinout manually at any point.

Step 6

CSV variation, twisted pair cables

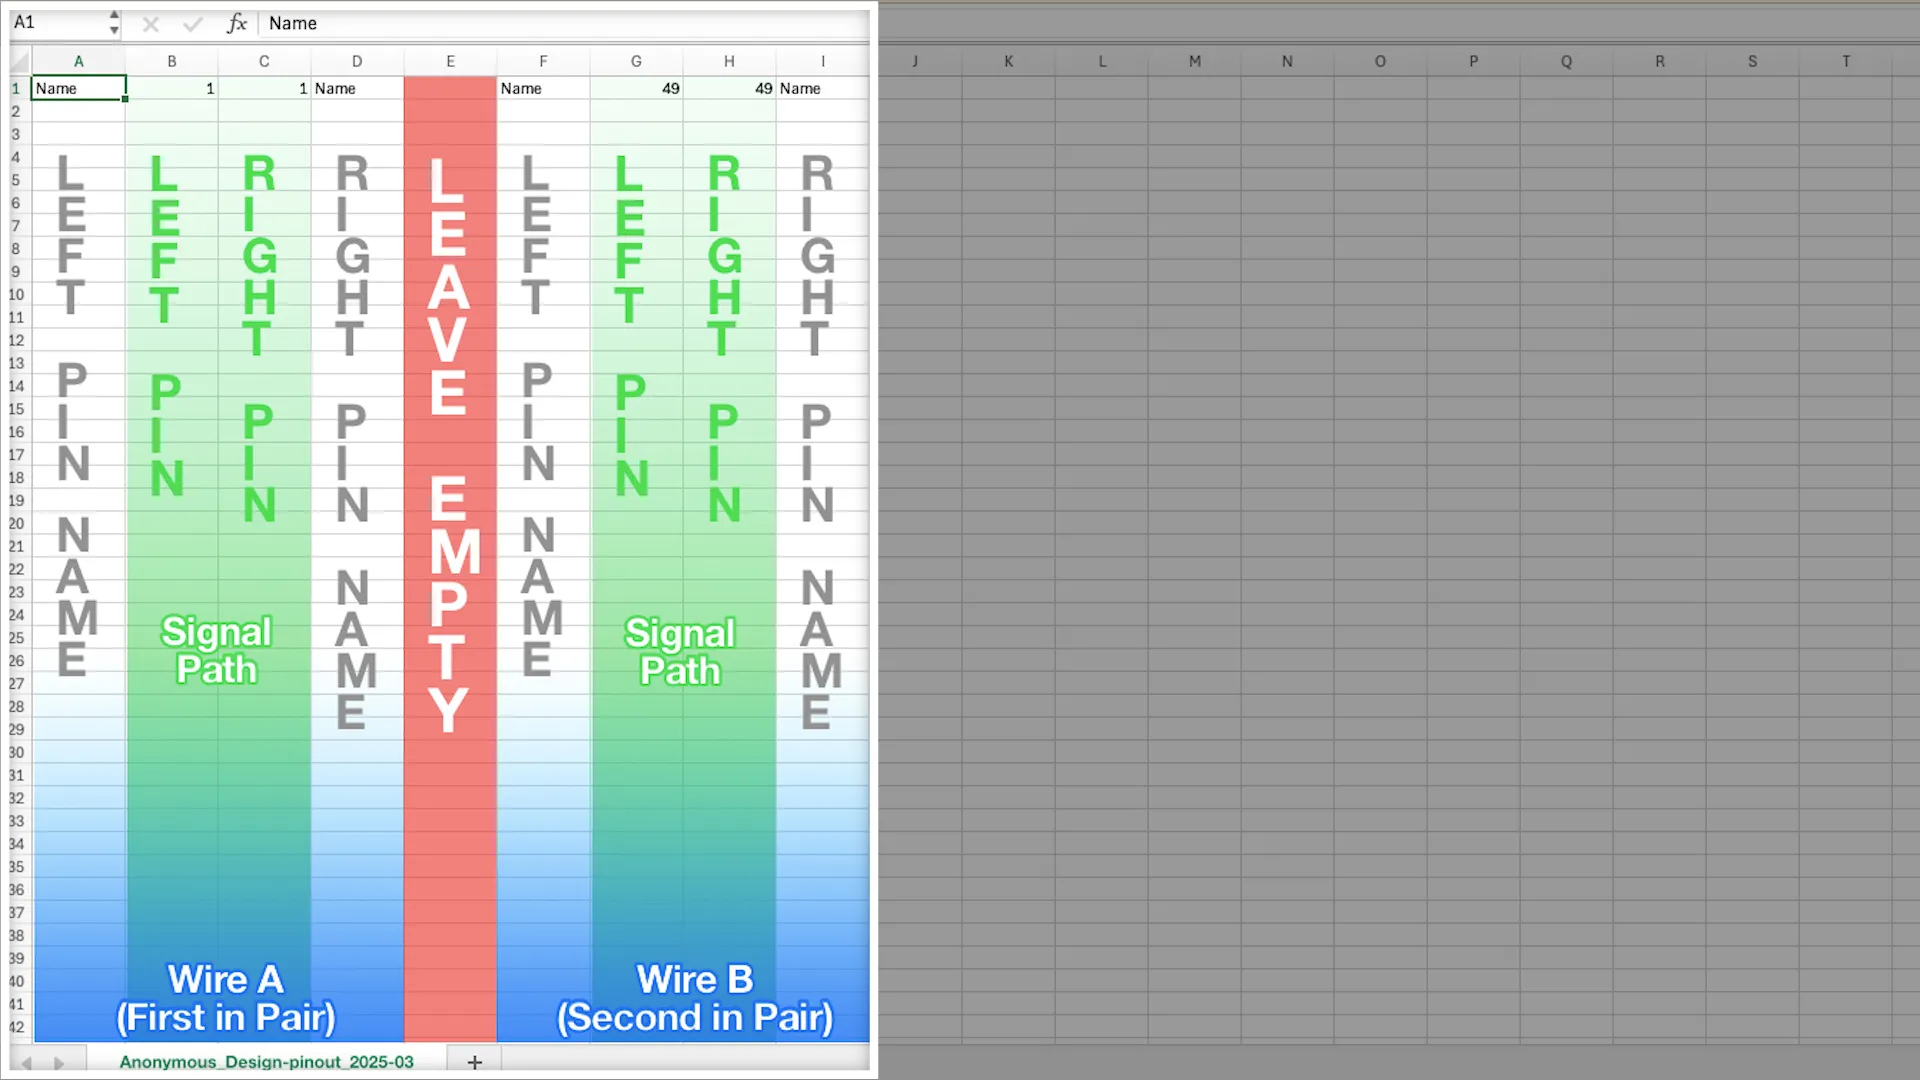
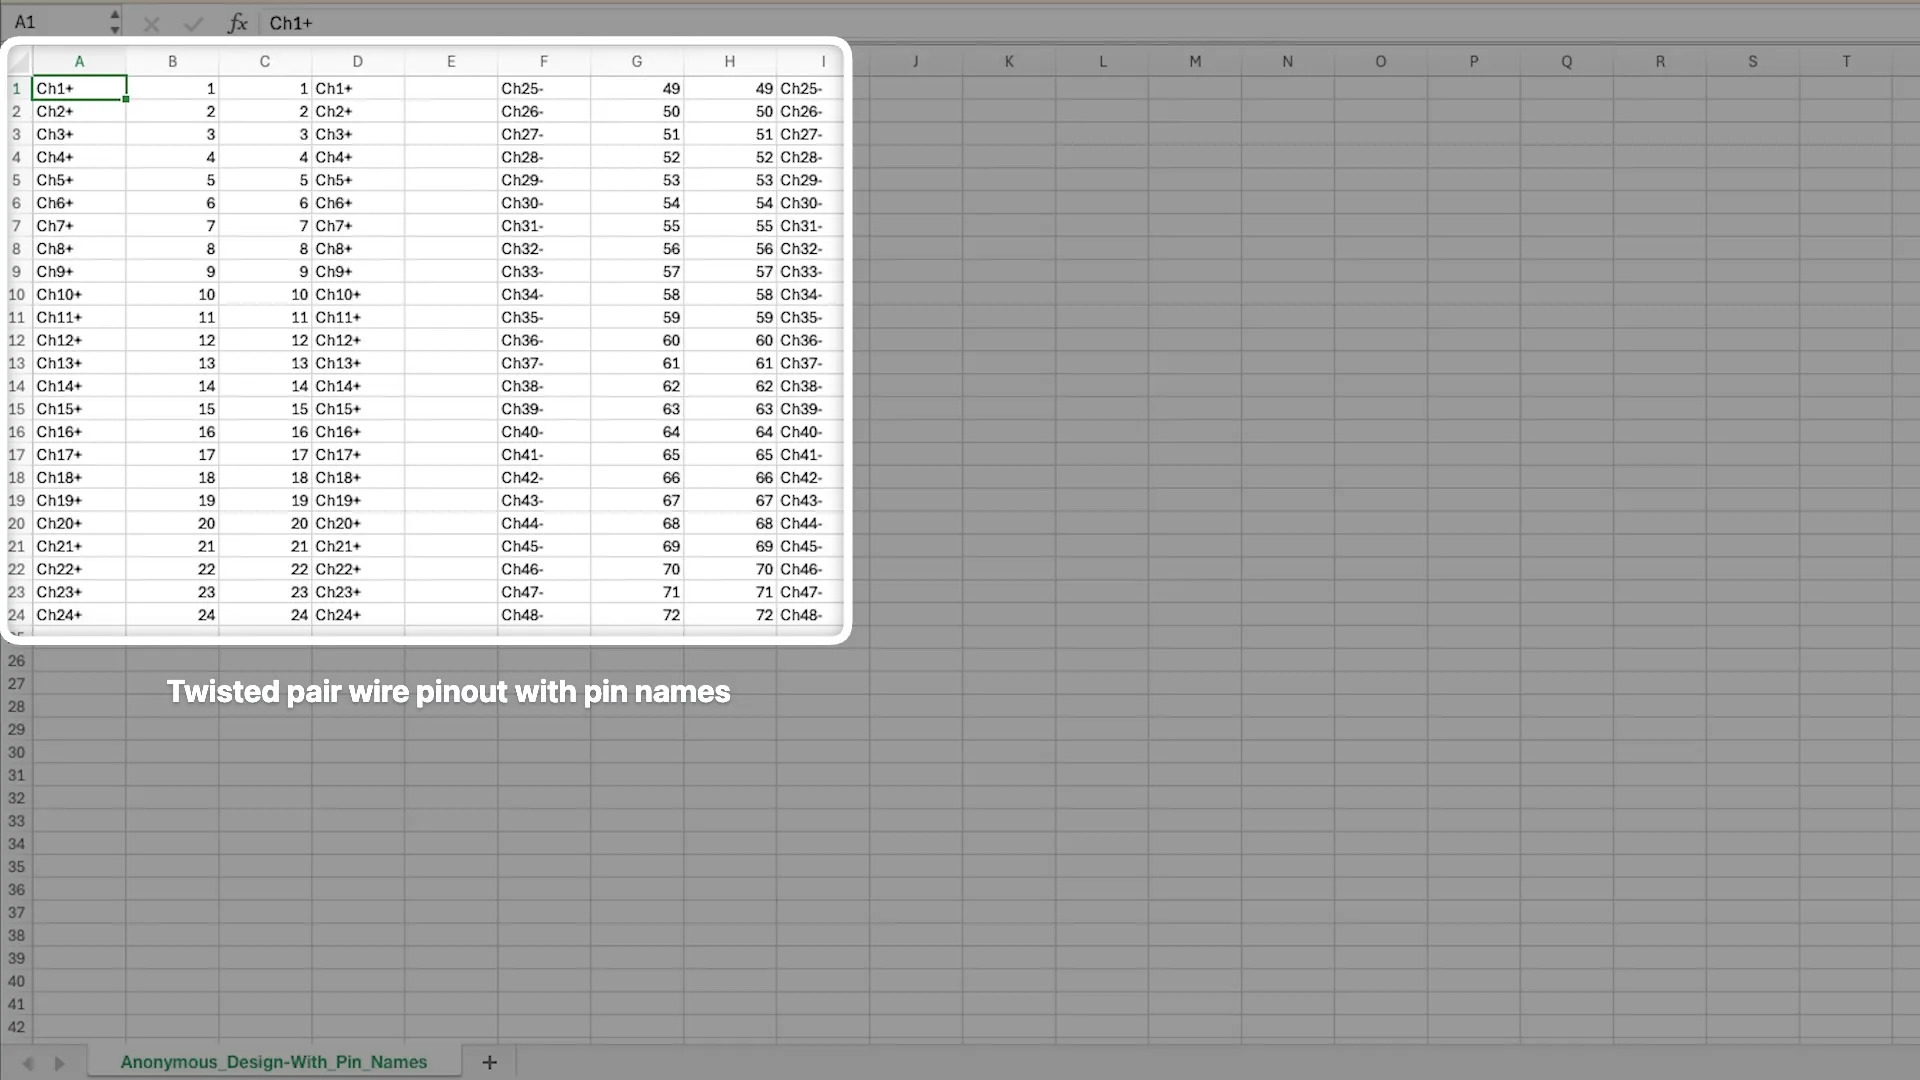
For twisted pair cables, the CSV structure is slightly different. Each twisted pair is split into two sections, Wire A and Wire B, with a blank column between them that must stay empty.

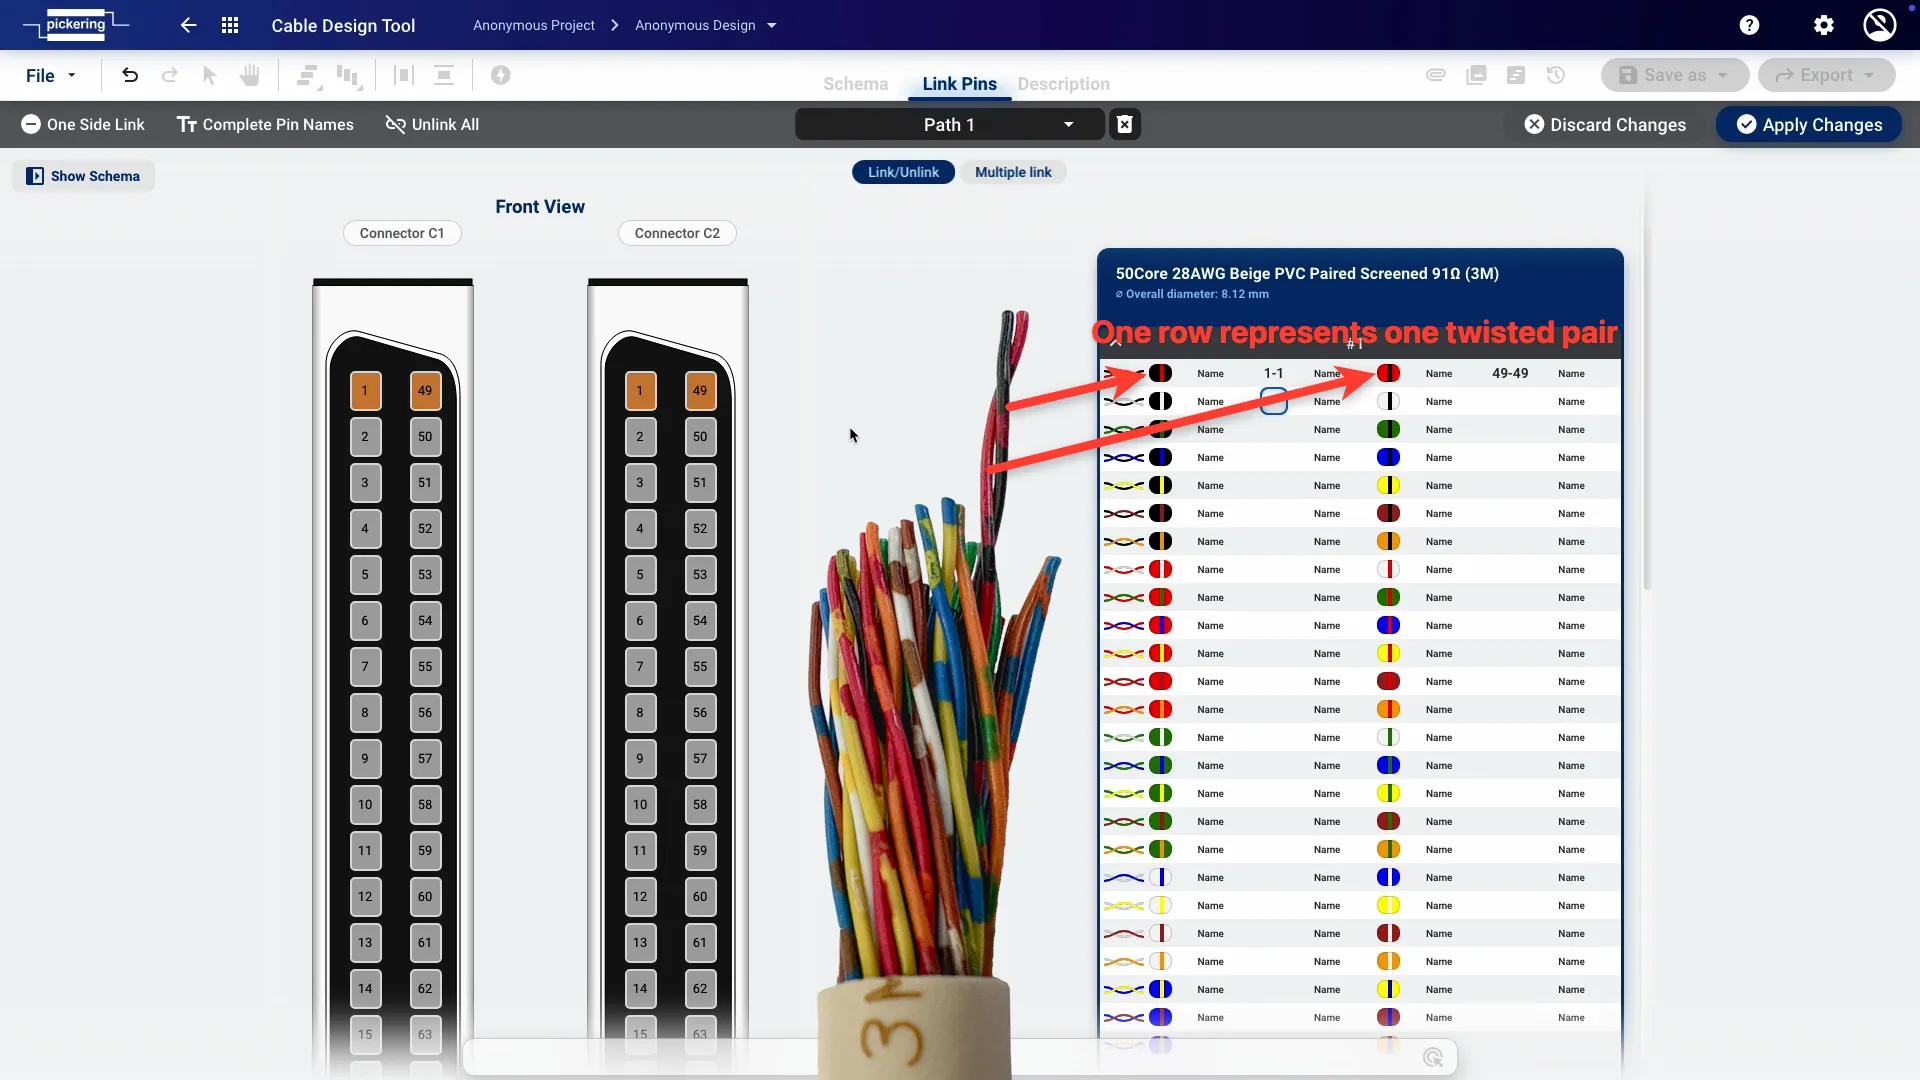
For example, when working with a 50-core twisted pair cable from 3M: the first wire (black with red stripes) links pin 1 on the right to pin 1 on the left, and the second wire (red with black stripes) links pin 49 on the right to pin 49 on the left. Export a template CSV after linking the first pair to see this structure in action.

As with single wires, you can choose whether or not to include pin names.

That covers the complete CSV workflow, from single-core cables to multi-core twisted pair cables, with various naming options.