
Leaded vs Lead-Free Solder: Why NASA Still Uses Lead
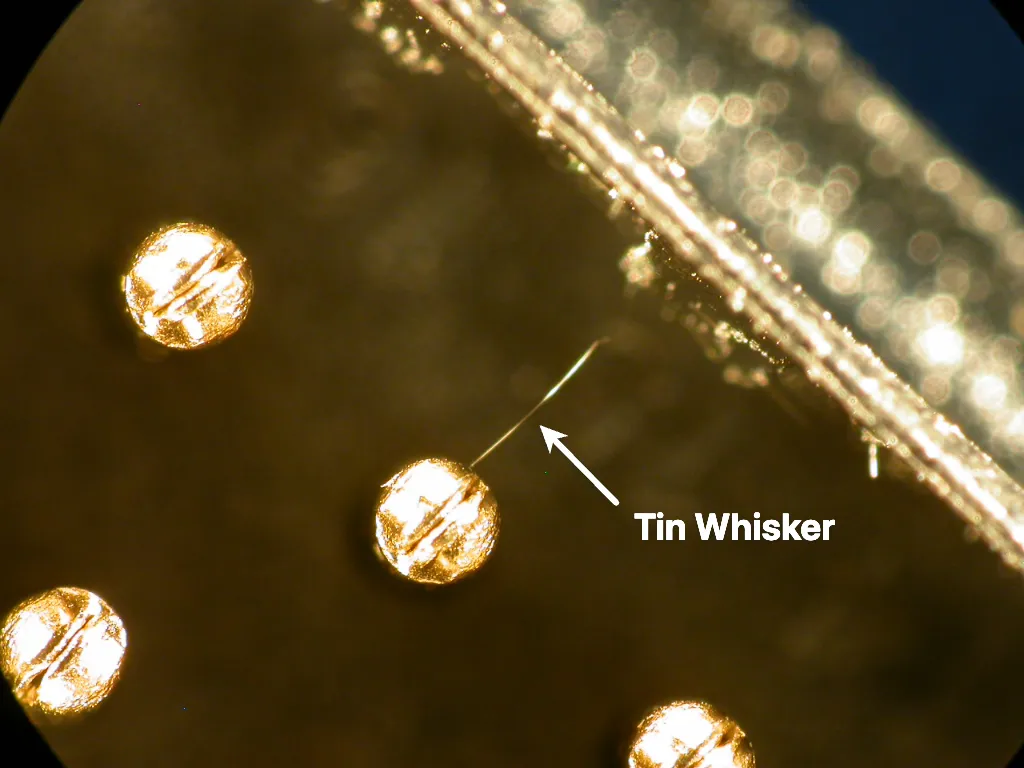
Leaded vs Lead-Free Solder: the Short Answer Measured on reliability, tin-lead solder is still the better alloy. In the NASA-DoD Lead-Free Electronics Project, one of the largest comparative test programs of its kind, tin-lead joints generally outlasted their lead-free counterparts in high-stress environments across 6,755 components, and lead-free held its own only in gentler conditions, steady temperatures, little vibration or shock [10]. The reason why lead-free solder nevertheless dominates the market today compared to leaded solder is more health-related than technical, because when the EU’s RoHS Directive restricted the lead content in electronics starting in 2006, its goal was to protect people and the environment, not to improve the quality of soldered joints [8]. That is precisely why even the most demanding programs on Earth and in space continue to rely on tin-lead alloys for their projects. NASA’s soldering quality standards have long specified the tin-lead alloys Sn60 and Sn63 [6], and the current standard at the Kennedy Space Center still requires the use of tin-lead alloys for critical ground support electronics [18]. It is also worth noting that the EU’s lead ban does not apply to military or space equipment [8], and a documented failure mode known as “tin whiskers” is a suspected cause of satellite failures in orbit that have been reported in hardware containing pure tin components [12]. The remainder of this article presents evidence to help you choose the right solution for your own project. What Is Solder Made Of? Solder is a fusible metal alloy that melts at temperatures below the melting point of the metals it joins, wets them, and, upon solidification, forms an electrically conductive joint. In electronics, there are two main types of solder. The traditional choice is tin-lead (SnPb) solder. The IPC/EIA J-STD-001C standard listed Sn60Pb40, Sn62Pb36Ag2, and Sn63Pb37 as base alloys, while other alloys were permitted in cases where data had demonstrated that they met reliability criteria [4]. The second group, lead-free solder, typically replaces lead with silver and copper, most commonly in the form of the SAC305 alloy, which contains 96.5% tin, 3% silver, and 0.5% copper [14]. The IPC/WHMA-A-620E standard, in turn, uses the SAC305 alloy as the reference lead-free solder bath [1]. Alloy Composition Melting point Type Sn63Pb37 63% Sn, 37% Pb 183 °C, eutectic [13] Leaded Sn60Pb40 60% Sn, 40% Pb 183 °C solidus, 190 °C liquidus [23] Leaded Sn62Pb36Ag2 62% Sn, 36% Pb, 2% Ag 179 °C [24] Leaded, silver-bearing [1] SAC305 96.5% Sn, 3% Ag, 0.5% Cu 217 °C solidus, 220 °C liquidus [14] Lead-free SAC387 95.5% Sn, 3.8% Ag, 0.7% Cu 217 °C [27] Lead-free, high-silver High-melting-point (HMP) ≥85% Pb well above Sn63Pb37 Leaded, RoHS-exempt [7][8] Sn63Pb37 is eutectic, meaning it goes from solid to liquid at a single temperature with no plastic range, which is part of why it is so forgiving to work with [13]. Leaded vs Lead-Free Solder Compared The trade-offs are consistent across sources. What changes is which ones matter for your application. Property Tin-lead (Sn63Pb37) Lead-free (SAC305) Melting point 183 °C eutectic [13] 217–220 °C [14] Process temperature margin ~35 °C more thermal budget for parts and boards [13][14] Hotter process, less margin Joint appearance Shiny to satin, smooth, concave meniscus [1][3] More likely grainy or dull, greater wetting contact angles [1] Inspectability Familiar visual baseline [3] Dull finish is acceptable, not a defect, but inspectors misread it [1][3] High-stress reliability (thermal cycling, vibration) Generally more reliable [10] Generally fails first [10] Low-stress reliability Baseline Generally outperforms SnPb, mechanical shock excepted [10] Tin-whisker risk Lead addition suppresses growth [2][11] Susceptible regime per IPC (<3% Pb) [2] Mixing solders SnPb rework restores the reliability of a joint built that way from the start [10] Joints with both alloys in them are the least reliable configuration measured [10] Regulatory status Banned in RoHS-scope EEE above 0.1% Pb; military/space not covered, HMP alloys exempted [8] Required to meet the 0.1% Pb limit in RoHS-scope products [8] Health handling Hygiene-controllable; airborne lead is very low at iron temperatures [15], so hand-to-mouth ingestion is the dominant uptake route [19] No lead, but hotter process and more flux fume Is lead-free solder as good as lead solder? Not in environments where reliability is most important, but in less demanding conditions, it can be a good alternative. As part of a project by NASA and the U.S. Department of Defense, more than 30 chemical compositions of solder joints were tested on 6,755 components under conditions involving temperature cycling, vibration, drop impacts, and combined loads. For most types of components, control samples with tin-lead solder proved to be more reliable under demanding military conditions. In contrast, under low-stress conditions, lead-free joints generally outperformed SnPb joints, with mechanical shocks being a notable exception to this trend [10]. The report’s introduction openly highlights what is at stake: the approval of lead-free components “produces one of the greatest risks to the reliability of a weapon system” due to new and as yet insufficiently understood failure mechanisms and unknown long-term reliability [10]. What are the disadvantages of using lead-free solder? The main disadvantages relate to the manufacturing process and reliability, not just workability: Higher process temperature. The increase from 183 °C to 217–220 °C consumes roughly 35 °C from the thermal budget previously available to heat-sensitive components, connector bodies, and insulation [13][14]. Joints that look wrong but aren’t. Lead-free solder joints are more likely to be grainy or dull with greater wetting angles. Both IPC-A-610 and A-620E standards state that dull, matte, or grainy joints, which are typical for a given alloy, are acceptable. In a lead-free production line, it is therefore essential that inspectors undergo retraining on these standards; otherwise, good joints will be unnecessarily reworked for cosmetic reasons [1][3]. Stiffer failure behavior. Comparative data show that lead-free joints fail earlier under high thermal and vibration stress [10]. The commonly offered explanation is that stiffer SAC alloys transfer more stress into the board and terminations than ductile SnPb alloys, although the test report itself documents the result rather […]
From Cable Design to Test: How We Reduce Build Errors in Assembly Production
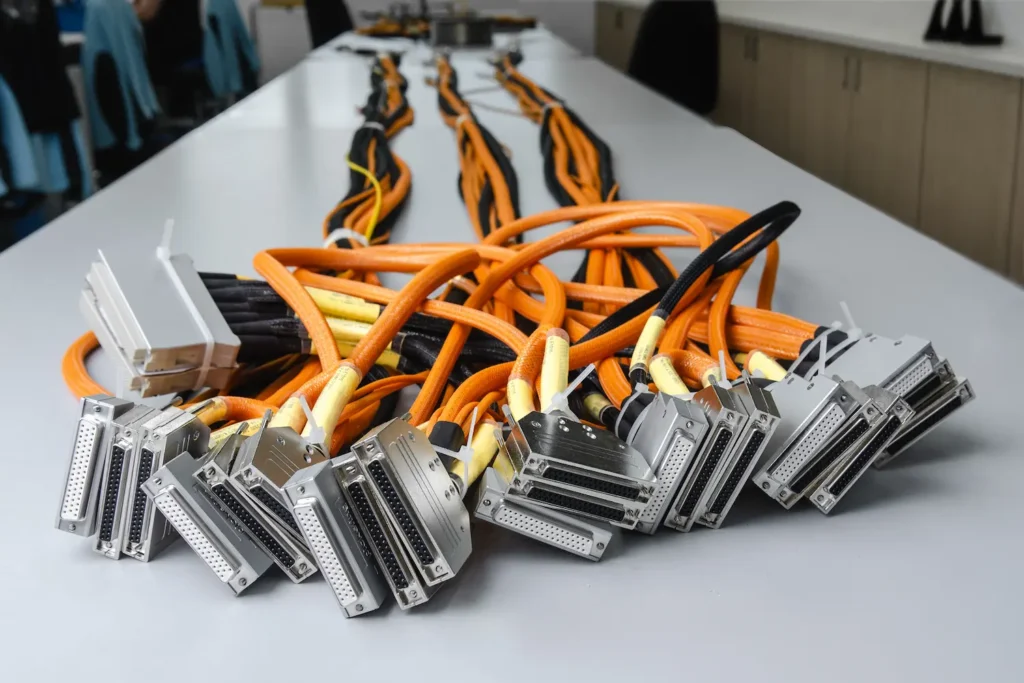
A custom cable assembly passes through three stages: design, manufacture, and test. On most production lines those stages run on three separate sets of data: a schematic, a set of build notes, and a test program, each maintained separately and each able to drift out of agreement with the others. A wire gauge that was correct on the drawing and wrong on the build sheet. A pin reassigned in design but never updated in the test program. These differences rarely surface on the bench, they surface in service. Our in-house Test System Architect (TSA) removes that separation. TSA is a suite of tools for designing test systems, and the Cable Design Tool (CDT) is the tool within it that makes this possible for cable assemblies. The design a customer creates and signs off in CDT becomes the single source of data for everything that follows: the manufacturing documentation, the build at the bench, and the test procedures. The assembly is built and verified against the design that was approved, not against a second-hand interpretation of it. Test System Architect links design, build and test to one approved dataset. The design is the specification CDT is a browser-based tool for building a cable assembly graphically, either from scratch or from a library of our standard cable sets. The design is not a drawing that later gets translated into manufacturing data, it is the manufacturing data. A completed CDT design holds: Full signal routing: which conductor connects to which pin, at both ends Wire types and gauges for every path Connector and backshell selection Path lengths, plus screening and sleeving details Labels: signal names that can be printed on wire ends and along paths for traceability Once the customer signs off, that approved design carries through every stage as a single record. The same data drives the build and the test, with nothing re-entered or re-interpreted between them, so the connectivity the customer approves is the exact connectivity that is built and verified. The harness designed in the Cable Design Tool A guided, automated build — down to a single piece The build is run by our in-house Cable Build Assistant, which works directly from the approved design rather than from a printed instruction the assembler has to interpret. It shows exactly which wire connects to which pin, and which wire type and gauge to use, guiding the build step by step. It removes the interpretation step between design intent and physical build It holds complex, high-pin-count, mixed-connector assemblies to the design without relying on operator memory It prints labels straight from the design, so a wire can’t be mislabeled, a classic source of build errors It applies to a one-off the same way it applies to a production run (there is no minimum quantity for the automation to apply) Driving the build straight from the approved design is what shortens build time and reduces the fail rate. That matters most for low-volume, high-mix work, where most builds are small quantities and the cost of a manual miswire is highest. “We didn’t have to explain how our schematic should be interpreted. All the details regarding wire types and gauges were within the design tool.” Test Engineer, major airline Two-stage verification Verification starts during the build and is driven directly by the approved design. As the Cable Build Assistant guides each connection it checks the pin-out in process — and once the assembly is complete it runs a full low-voltage test across the whole harness, catching shorts, miswires and missing signals before the cable goes anywhere. The assembly then moves to a dedicated electrical bench for the measurements that demand precision: Path resistance — measured on a Cirris tester with the 4-wire (Kelvin) method (0.001 to 10 Ω, ±2% ±0.001 Ω), so the reading reflects the cable, not the leads or fixture. Insulation — a hi-pot test (100 V to 2 kV DC) checks insulation resistance (5 MΩ to 1 GΩ, ±10%) and dielectric withstand. The Cable Build Assistant confirms the assembly is wired exactly as the approved design specifies; the bench then confirms its electrical integrity, so every cable leaves the facility verified on both counts. Every cable assembly is verified on a Cirris tester. Proof: a 131-signal HIL test station harness This workflow built and verified a four-part wiring harness for a major airline’s fuel-control-system hardware-in-the-loop (HIL) test station. The harness carried 131 signals across 28 D-type connectors, four 160-pin DIN 41612 connectors, two 500-pin SEARAY connectors and four banana jacks, using more than 2 km of double-screened wire across four gauges. The airline’s own engineers produced the design in CDT. At sign-off, Cable Build Assistant drove the build directly from that design, and the harness was verified against the test sequence above. As the airline’s Test Engineer put it, the build data did not need to be explained, the wire types and gauges were already in the design tool, and the assemblers worked straight from it. The finished harness worked as soon as it was connected between the fuel control system and the HIL station. The finished 131-signal harness, built and tested to the approved CDT design. Case study A Major Airline Selects Pickering for Fuel Control System HIL Test Station Harness Read the entire article on pickeringtest.com The result Integrating design, manufacturing, and testing into a single approved design delivers three things you can rely on: a build that matches the approved design without re-interpretation, a test that measures the cable against that same design, and a reorder placed years later that is built and tested against the exact specification on file. The automation that makes this possible is not reserved for volume. It applies from the first piece. Design your cable Prefer to leave the design to us? Send your sketch or schematic and our engineers will turn it into a build-ready design. Send us your drawing
Soldering vs Crimping: Which Is Better and When
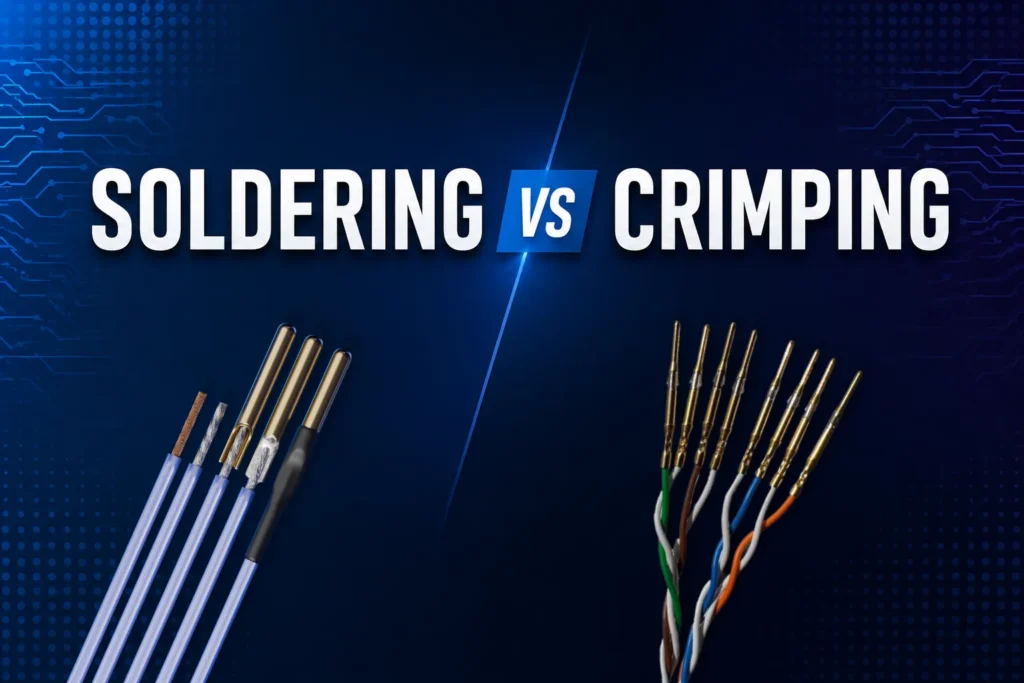
Wire Termination Methods — Crimping and Soldering Crimping is the controlled mechanical compression of a contact barrel around a conductor to create a permanent electrical and mechanical termination [3][4]. NASA defines soldering as “the process of joining clean metallic surfaces through the use of solder without direct fusion of the base metals” [2]. In high-reliability cable and harness work, the standards cited here generally prefer crimping for removable contacts and many splice applications, but soldered contacts are also used where the connector design, contact style, or assembly requirement calls for them [1][3][4][5]. For wire-to-contact and many wire-to-wire terminations, crimping is the default method in these standards. The sections below explain why — and identify the cases where solder is still appropriate [1][3][4]. Crimp vs Solder — Performance Comparison Mechanical strength and vibration resistance For harnesses and cables that may be pulled, flexed, or be exposed to vibration, a properly made crimp is usually the better choice from a mechanical standpoint. A properly formed crimp is evaluated by pull testing, meaning the wire is physically pulled to confirm the crimp can withstand a minimum force, not just by visual appearance: NASA-STD-8739.4A requires crimp pull strengths to meet minimum values by wire gauge, and failures below those values are rejects [1]. Selected values from NASA Table 12-1: Conductor Size (AWG) Minimum Tensile Strength, N (lb) 28 22 (5) 26 36 (8) 24 36 (8) 22 57 (13) 20 92 (21) 18 142 (32) 16 183 (41) Values for copper and high-strength copper alloy stranded conductors [1]. Soldered conductors behave differently under mechanical stress. NASA-STD-8739.4A states that stranded conductors will experience solder wicking during attachment, leaving the conductor rigid up to the point where wicking stops and flexible beyond it; wire movement then concentrates stress at that transition and can produce conductor fatigue and failure [1]. In practice, the concern is not just the geometric transition but the heat-affected zone immediately behind the soldered section: at soldering temperatures, the copper in that area can harden, lose ductility, and become more brittle than the wire beyond it. Combined with solder wicking, that leaves a stiff-to-flexible transition where repeated bending or vibration tends to damage the conductor just behind the soldered area rather than in the solder fillet itself. NASA-STD-8739.3 separately lists fractured and disturbed solder connections as rejection conditions [2]. Electrical performance and contact resistance From an electrical standpoint, properly made soldered and crimped terminations can both perform very well. The standards reviewed here treat both as valid when the termination matches the contact design and is made correctly [1][2][3]. In practice, real-world differences often come down more to workmanship, process control, and mechanical reliability than to any blanket advantage in pure resistance [1][2][3]. Thermal cycling and environmental durability Thermal cycling and vibration are well-established durability concerns for soldered joints in the academic literature [6][7][8]. Furthermore, IPC-HDBK-620 explains why crimping solder-tinned stranded wire is restricted in high-reliability work: solder acts as a malleable, variable-thickness lubricant, deforms under pressure, and recrystallizes under temperature cycling, degrading the crimp termination [4]. Consistent with that rationale, IPC-D-620A states that crimp termination of solder-tinned stranded wire and over-soldering of completed crimp terminations is prohibited [3]. NASA-STD-8739.4A also warns that solder wicking creates a rigid-to-flexible transition where movement can concentrate stress and produce conductor fatigue and failure [1]. Why not crimp AND solder? As a general rule, high-reliability standards are clear: do not improve a completed crimp by adding solder afterward. Applying soldering temperatures to a completed crimp anneals the compression zone, relaxing the gas-tight cold-weld developed during the crimping process [4]. The solder also cannot flow into the compression zone to wet all contact-conductor surfaces, so the result fails the acceptance requirements for both a crimped termination and a soldered termination [4]. Over-soldering of completed crimp terminations is prohibited for space and Class 3 applications [3]. The exception is a contact or assembly that is designed by the manufacturer to use both operations. Some wire-to-board contacts, for example, crimp the conductor first for wire retention and insulation support, then solder the crimped terminal into a PCB as part of the approved termination design. In those cases, the manufacturer’s documented tooling, process, and acceptance criteria govern the assembly; the problem is uncontrolled soldering of a normal completed crimp, not every engineered crimp-and-solder contact system. When to Crimp vs Solder — Selection by Application Crimping is the default IPC-HDBK-620 is direct: “Connectors using removable crimp contacts are preferred to solder contact types” [4]. IPC-D-620A likewise states that, as a preferred practice, crimp-type wire splices are recommended for higher reliability [3]. NASA-STD-8739.4A states that crimped contacts shall be used with stranded wire only; solid wire and solid, tinned wire shall not be used with crimped contacts [1]. IPC-D-620A likewise requires wire terminations to be compliant with the connector or terminal’s termination technology [3], and IPC-HDBK-620 treats crimping of solid wire and solder-tinned stranded wire as special cases requiring prior approval [4]. Soldering Applications — Where Solder Is Still the Right Choice Solder remains the correct termination method in several applications, including: Solder cup contacts — non-removable solder cups, including hermetic and environmental connectors, where the connector design uses soldered contacts [1]. Board and terminal soldering — J-STD-001 / J-STD-001FS covers soldered wires, terminals, and printed wiring assembly terminations, including PCB-related soldered connections [5]. Shield terminations — solder sleeves are one of the acceptable methods for terminating individual cable shields [1]. Fine-gauge repairs — repair of stranded wiring smaller than 28 AWG should be performed using a solder splice [4]. Compact splices — solder splices can produce a smaller physical profile than crimp splices in dense bundles [4]. Good Crimp vs Bad Crimp — Acceptance Criteria Crimp acceptance is typically controlled by 100 percent visual inspection and tensile pull testing against minimum force values defined by the applicable standard (e.g., NASA-STD-8739.4A, IPC/WHMA-A-620) or terminal manufacturer [1]. For production quality control, the tool/contact-conductor combination is pull-tested at the start and end of each work shift or production run, and production shall not proceed until there […]